19 of December of 2024
Connect Excel to Looker Studio: Step-by-Step Guide

Isaac Correa
Data Integration & Sources
Productivity & Automation

Turn your Excel spreadsheets into dynamic dashboards using Looker Studio with this quick and simple method.
Connect Microsoft Excel to Looker Studio: Simplicity Meets Power
Imagine transforming your Excel spreadsheets into stunning, interactive dashboards—faster than you ever thought possible. With Looker Studio’s Microsoft Excel connector, you can unlock the full potential of your data and turn numbers into actionable insights.
Bring Excel Data to Life
Static spreadsheets are a thing of the past. By integrating Excel with Looker Studio, your data becomes dynamic, visual, and shareable. Say goodbye to tedious updates and hello to dashboards that adapt to you.
Why Choose Excel with Looker Studio?
- Save time: Automate updates by directly connecting your Excel files.
- See the bigger picture: Combine Excel data with other sources for unparalleled insights.
- Work smarter: Share dashboards that are visually striking and easy to understand.
"Excel meets elegance with Looker Studio—because clarity should never be complicated."
Step-by-Step: How to Connect Excel to Looker Studio
1. Sign in to Looker Studio
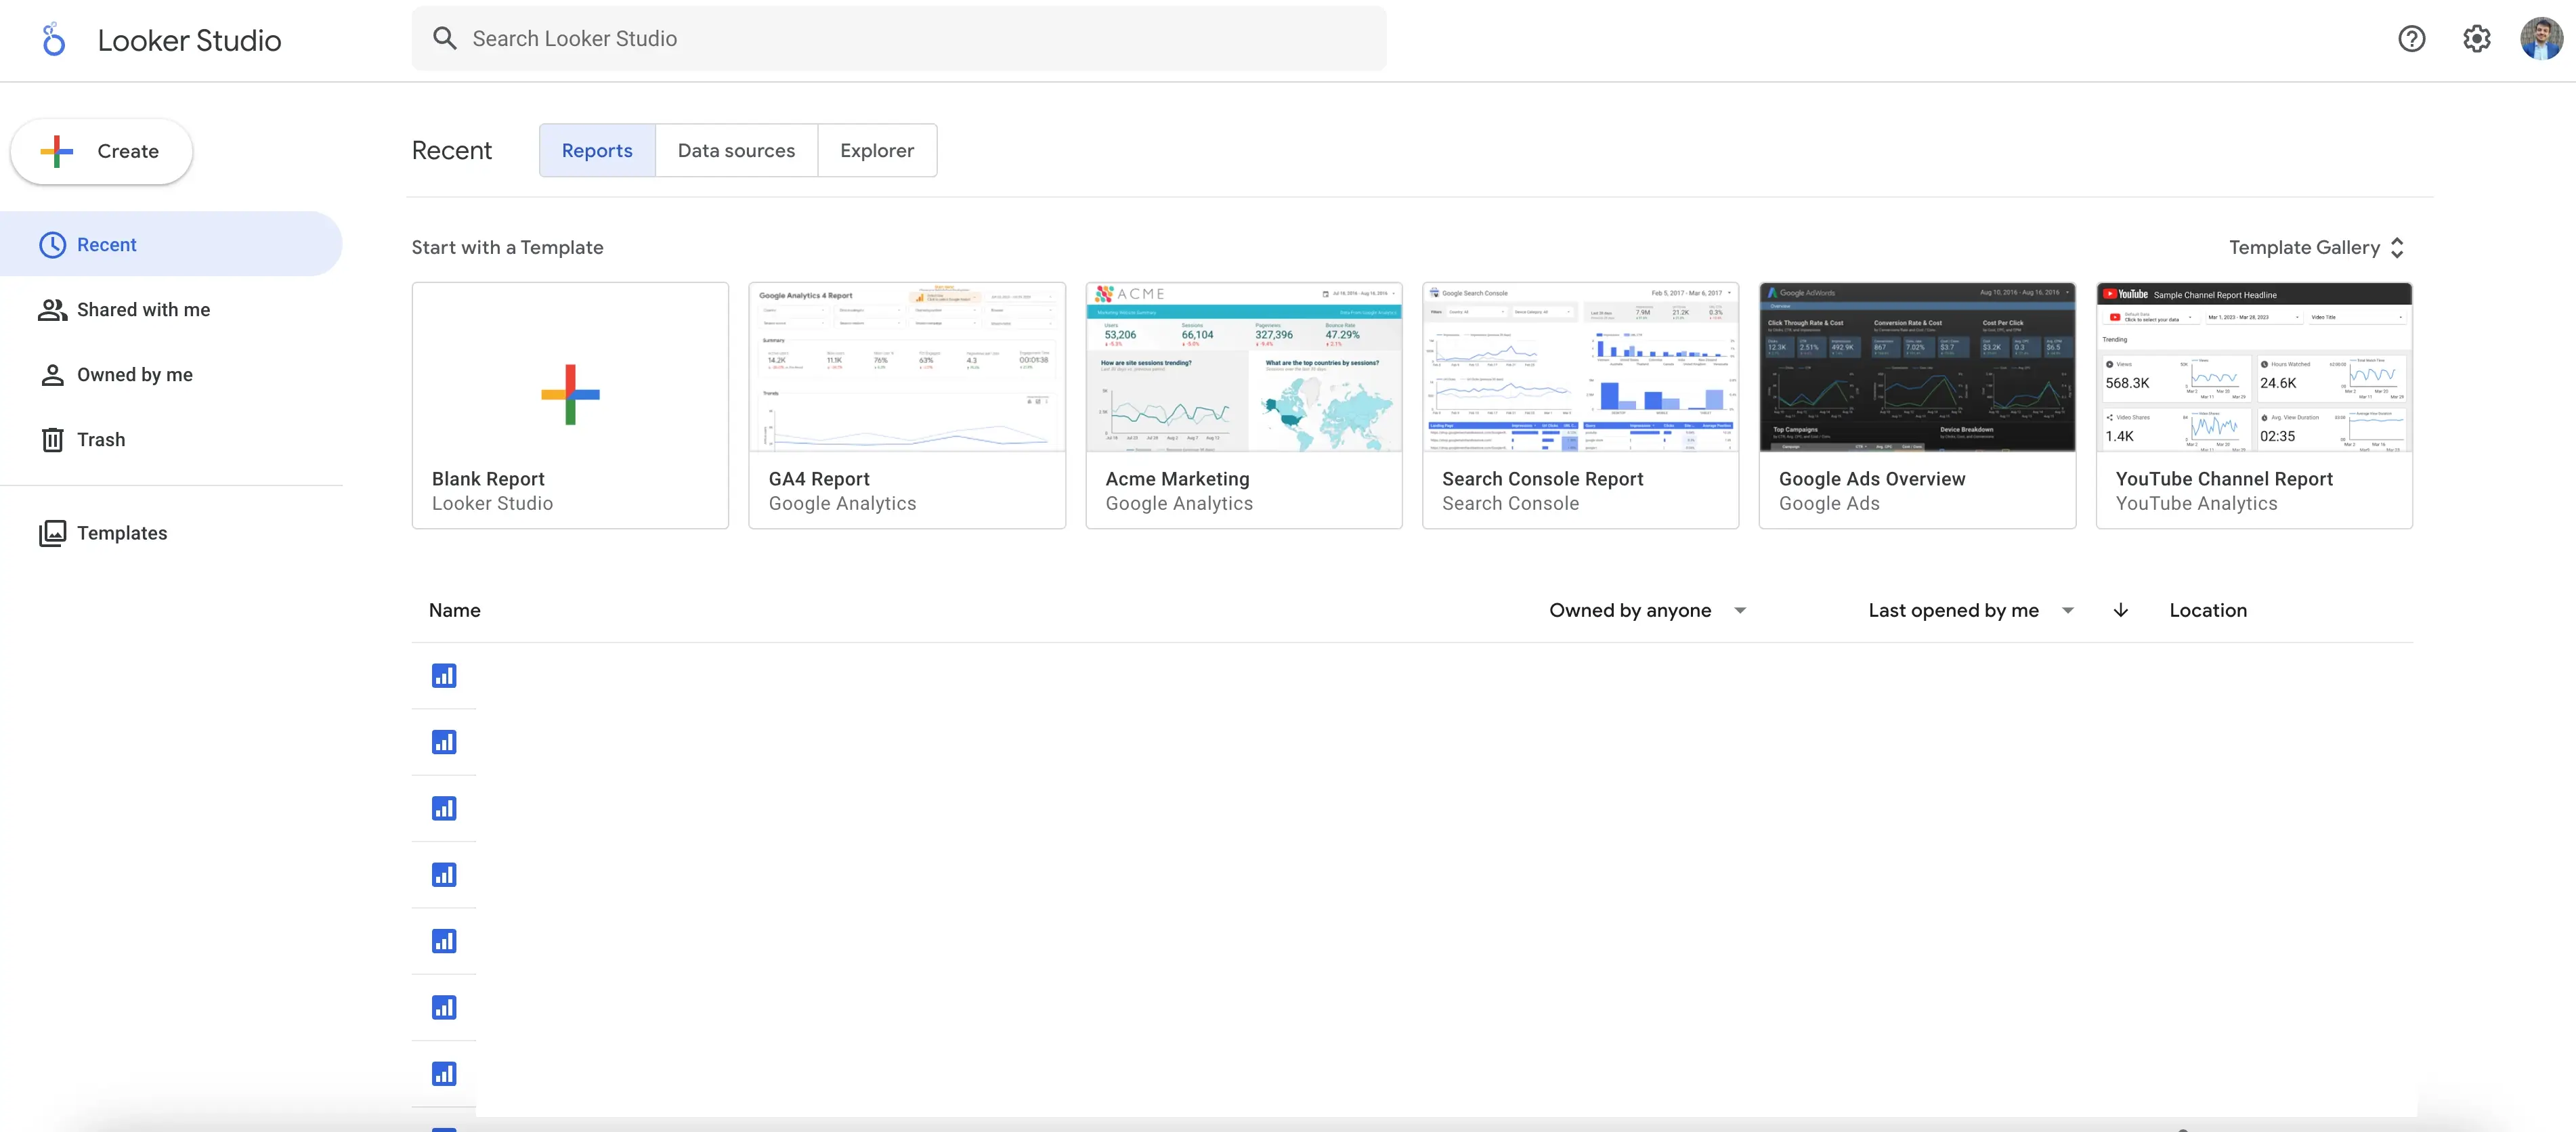
Image description: The Looker Studio homepage, where you begin connecting Microsoft Excel data to create dynamic dashboards.
- Open your browser and go to Looker Studio.
2. Start a New Data Source
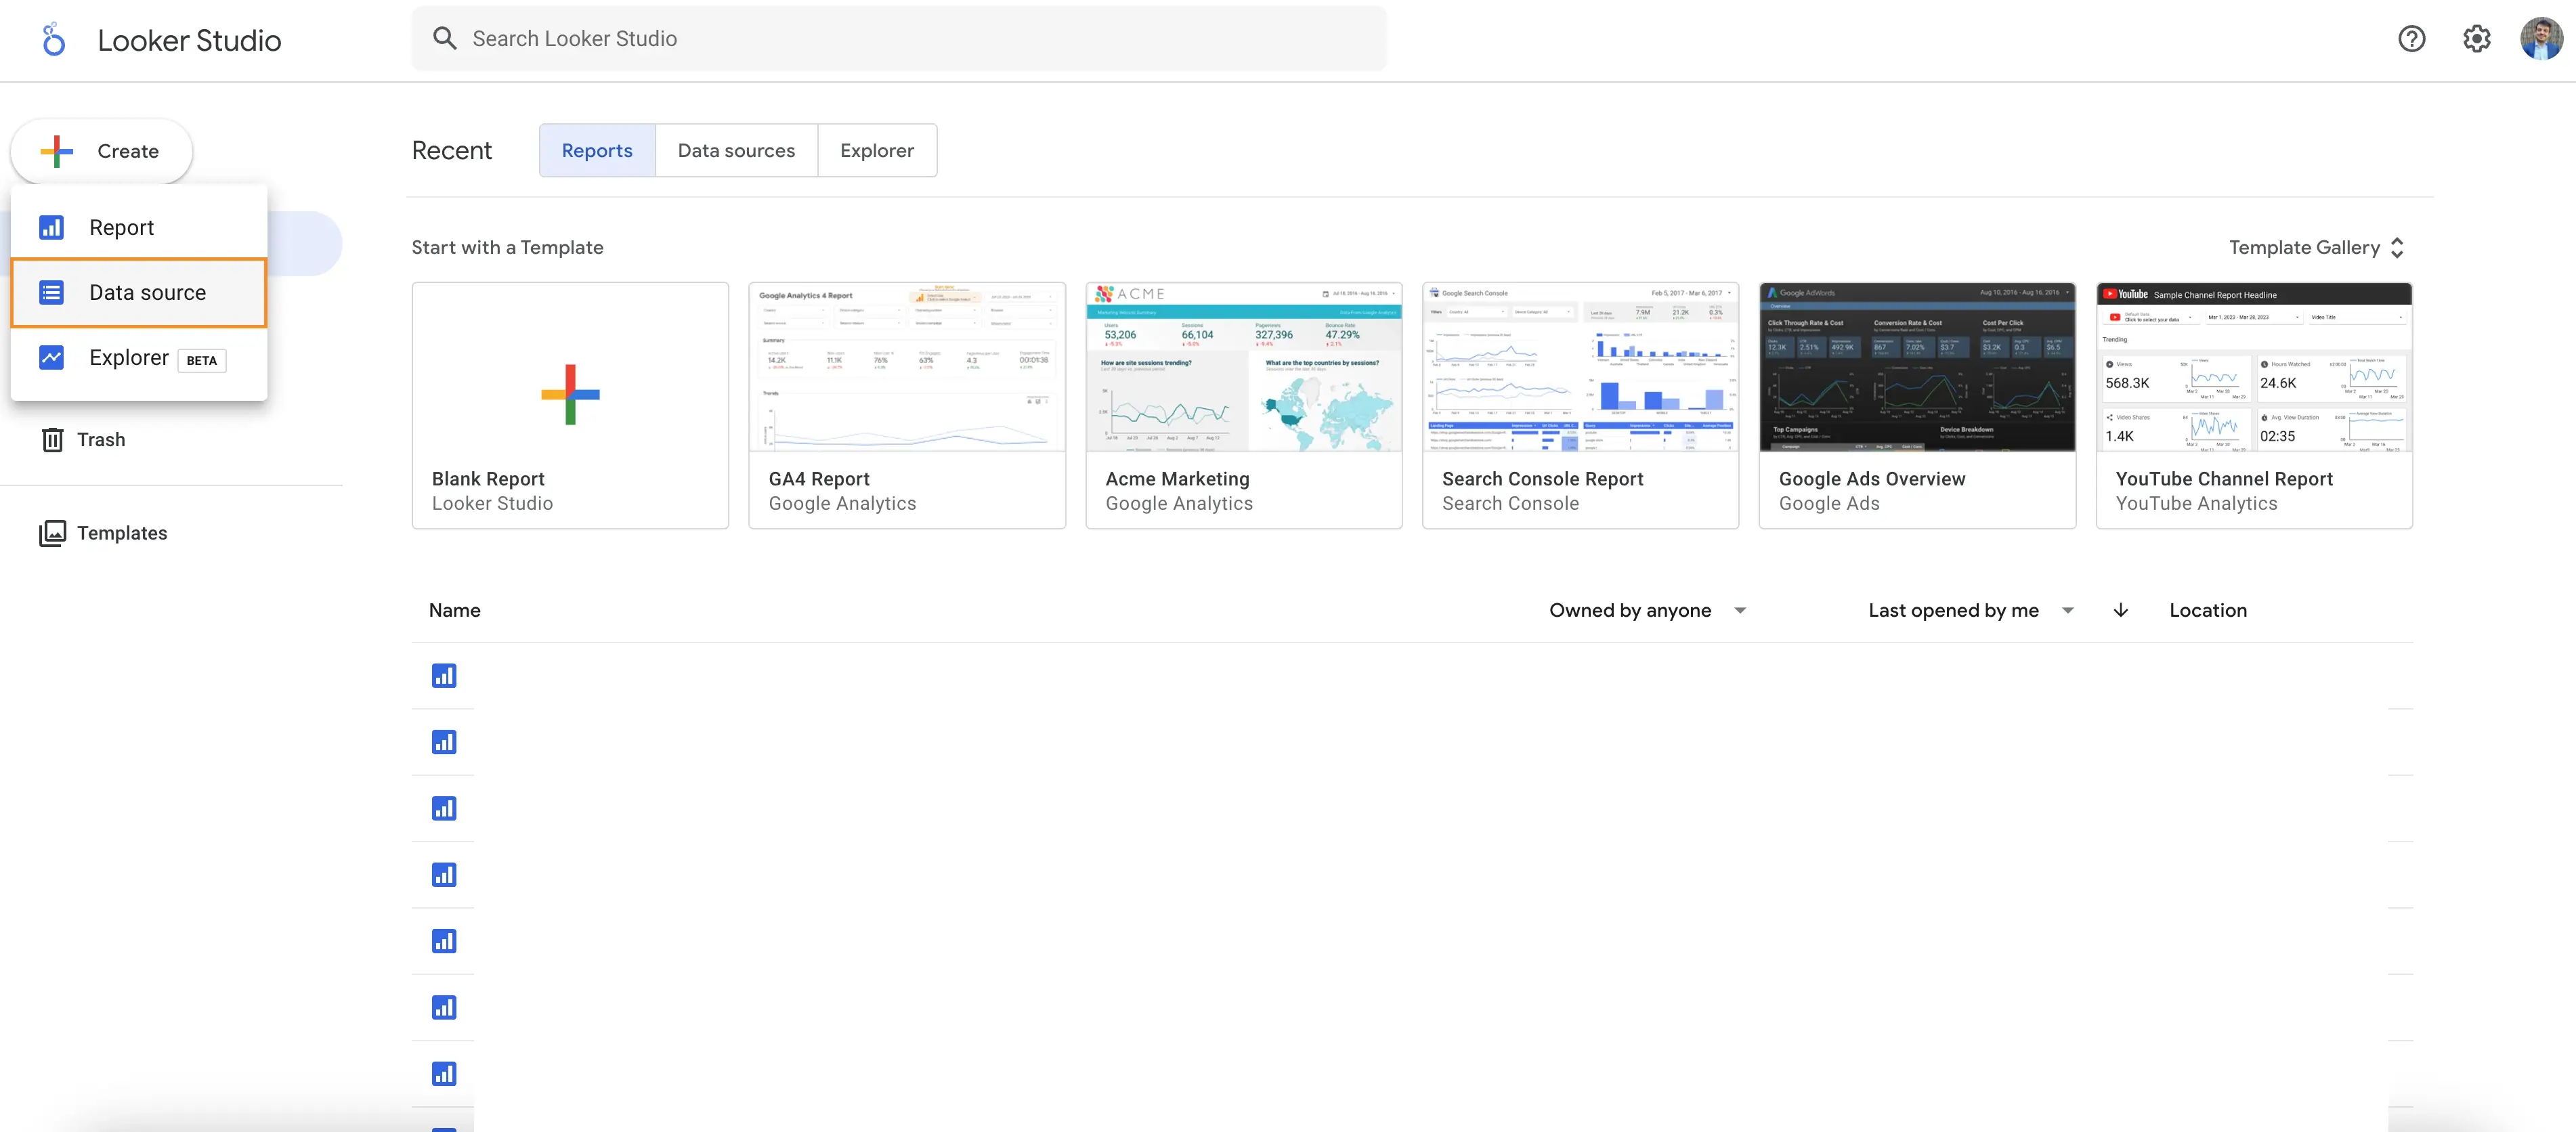
Image description: The process of creating a new data source in Looker Studio to connect your Excel file.
- Click the Create button in the top left corner of the screen.
- From the dropdown menu, select Data Source.
3. Choose the Microsoft Excel Connector
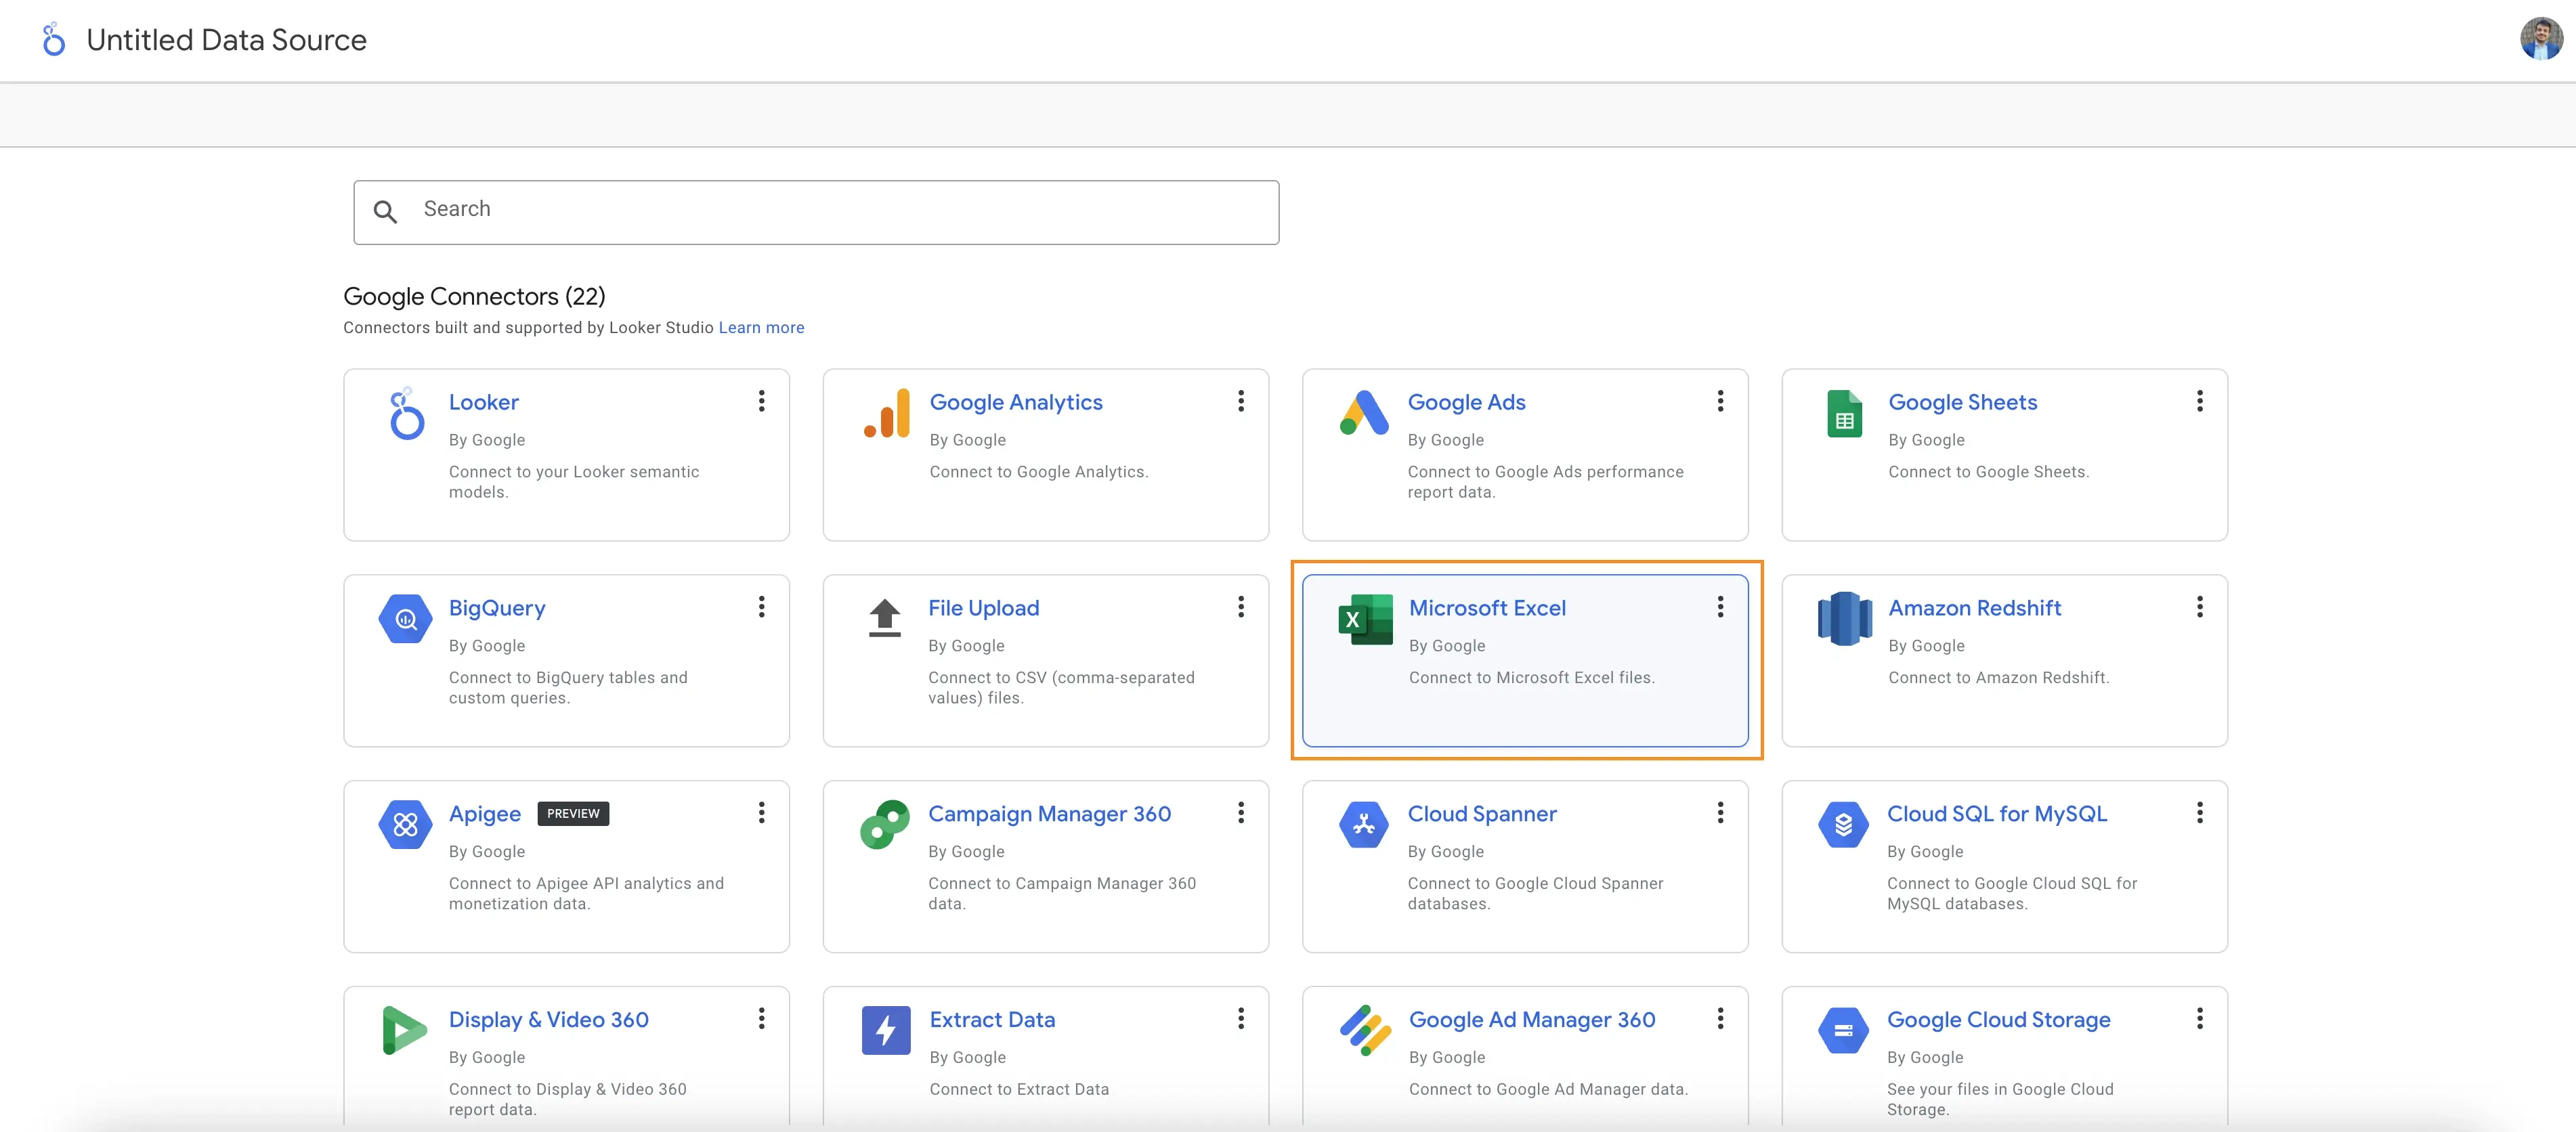
Image description: The Microsoft Excel connector highlighted in Looker Studio, ready for integration.
- Scroll through the list of connectors or type "Excel" into the search bar.
- Select the Microsoft Excel connector.
4. Upload Your Excel File
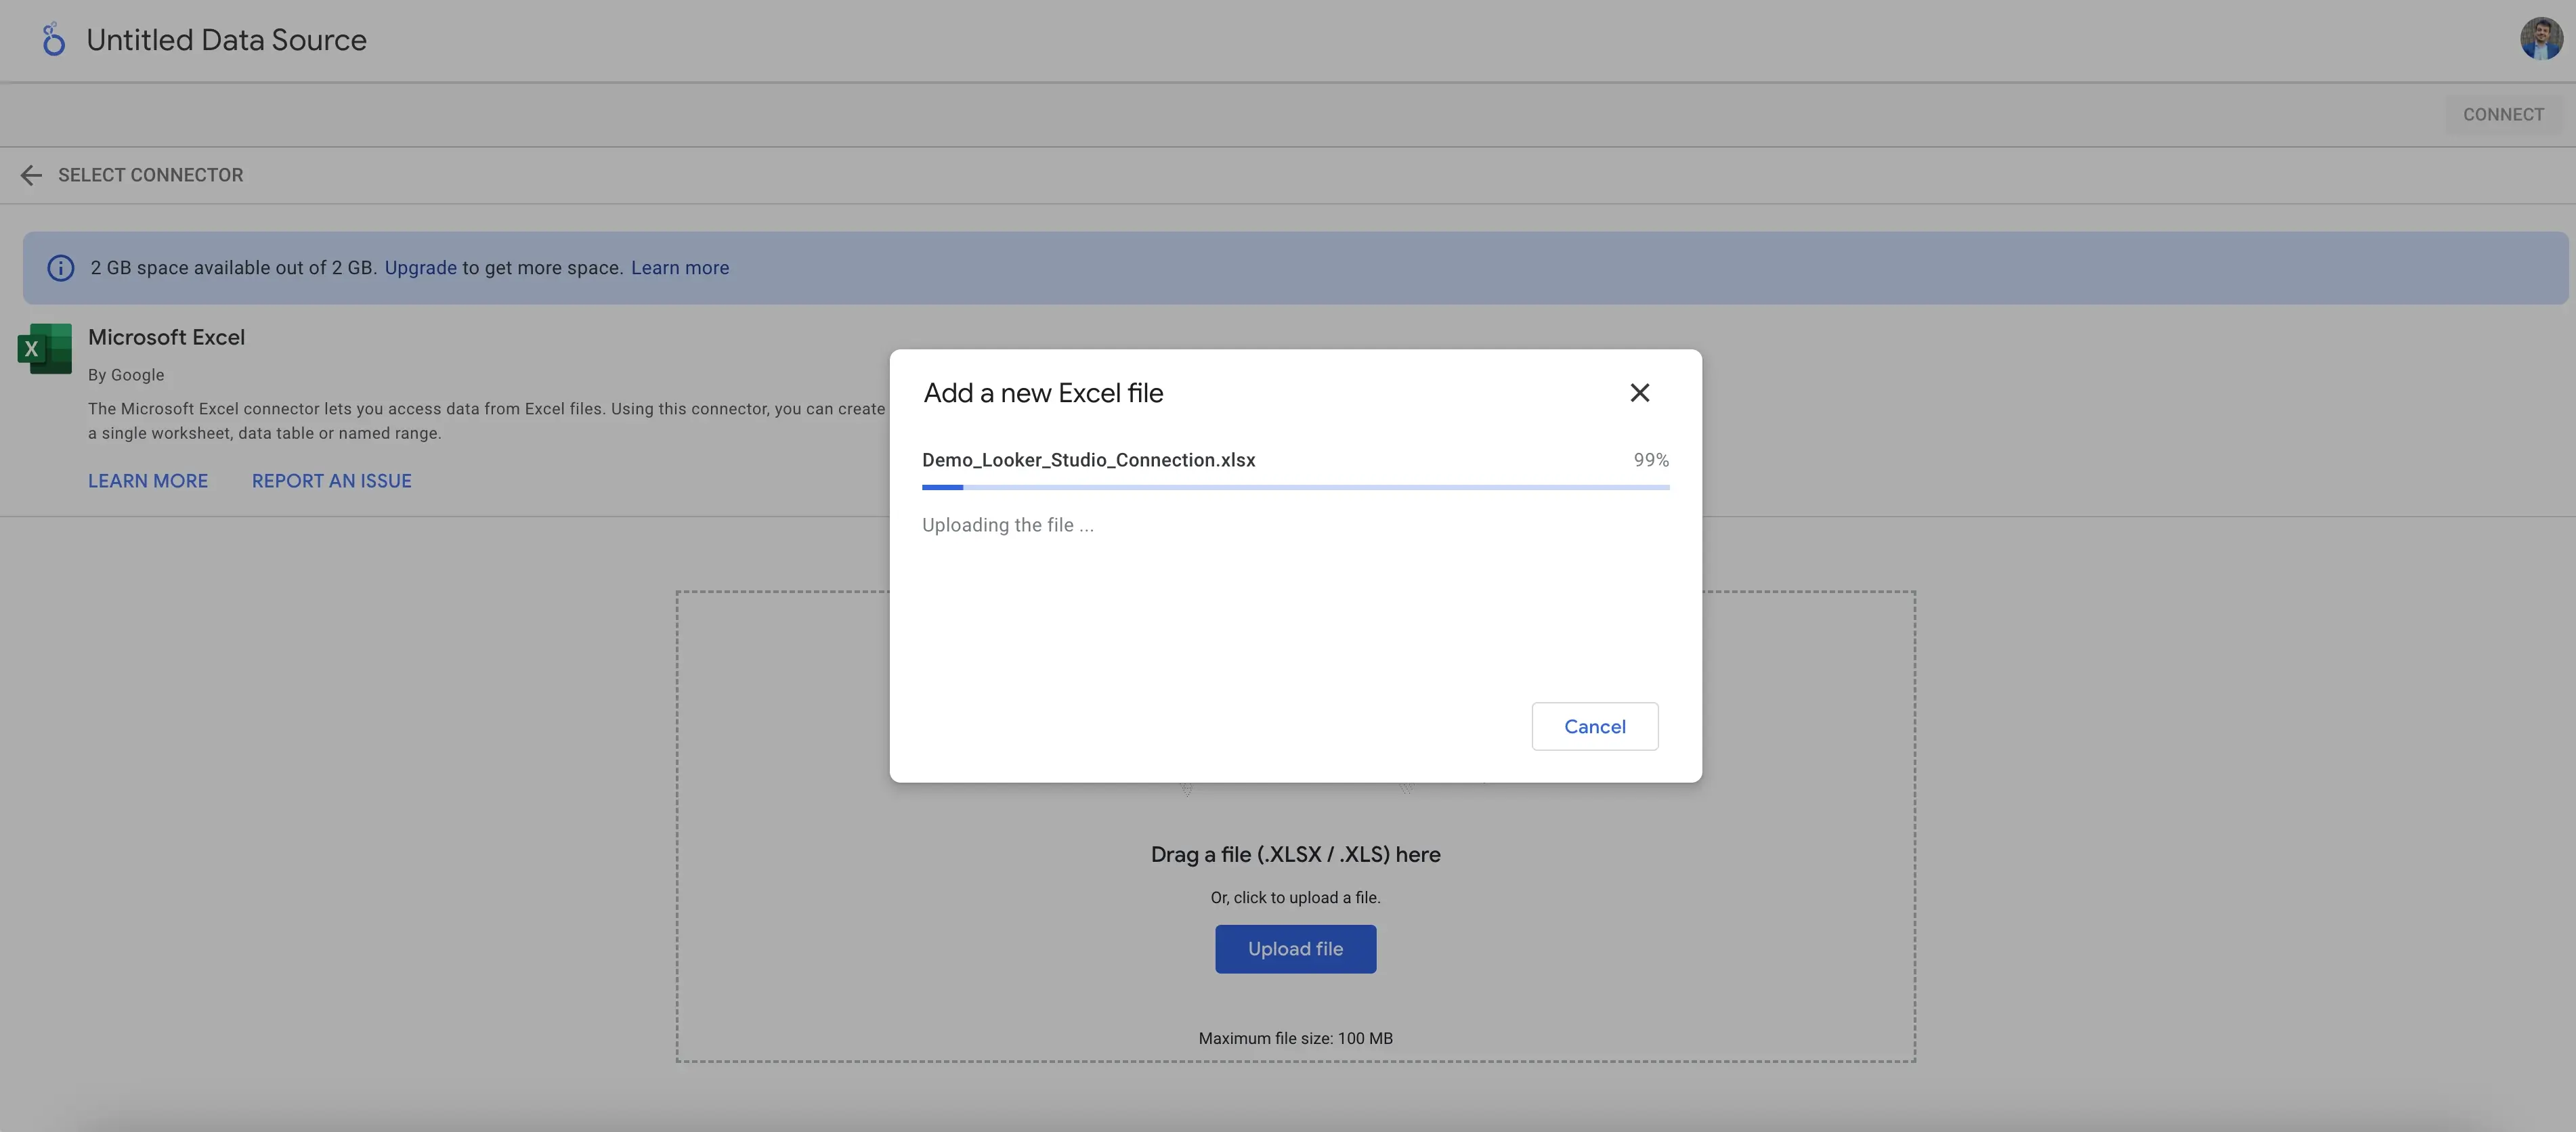
Image description: Uploading an Excel spreadsheet to Looker Studio to start building a dashboard.
- In the Available Files section, click the + New button.
- Select the Excel file you want to upload from your computer.
Important Requirements:
- File size must be under 100 MB.
- Files cannot include macros, pivot tables, or passwords.
- Online Excel spreadsheets are not supported.
- Once uploaded, your file will appear in the list of available files.
5. Select Your Worksheet or Range
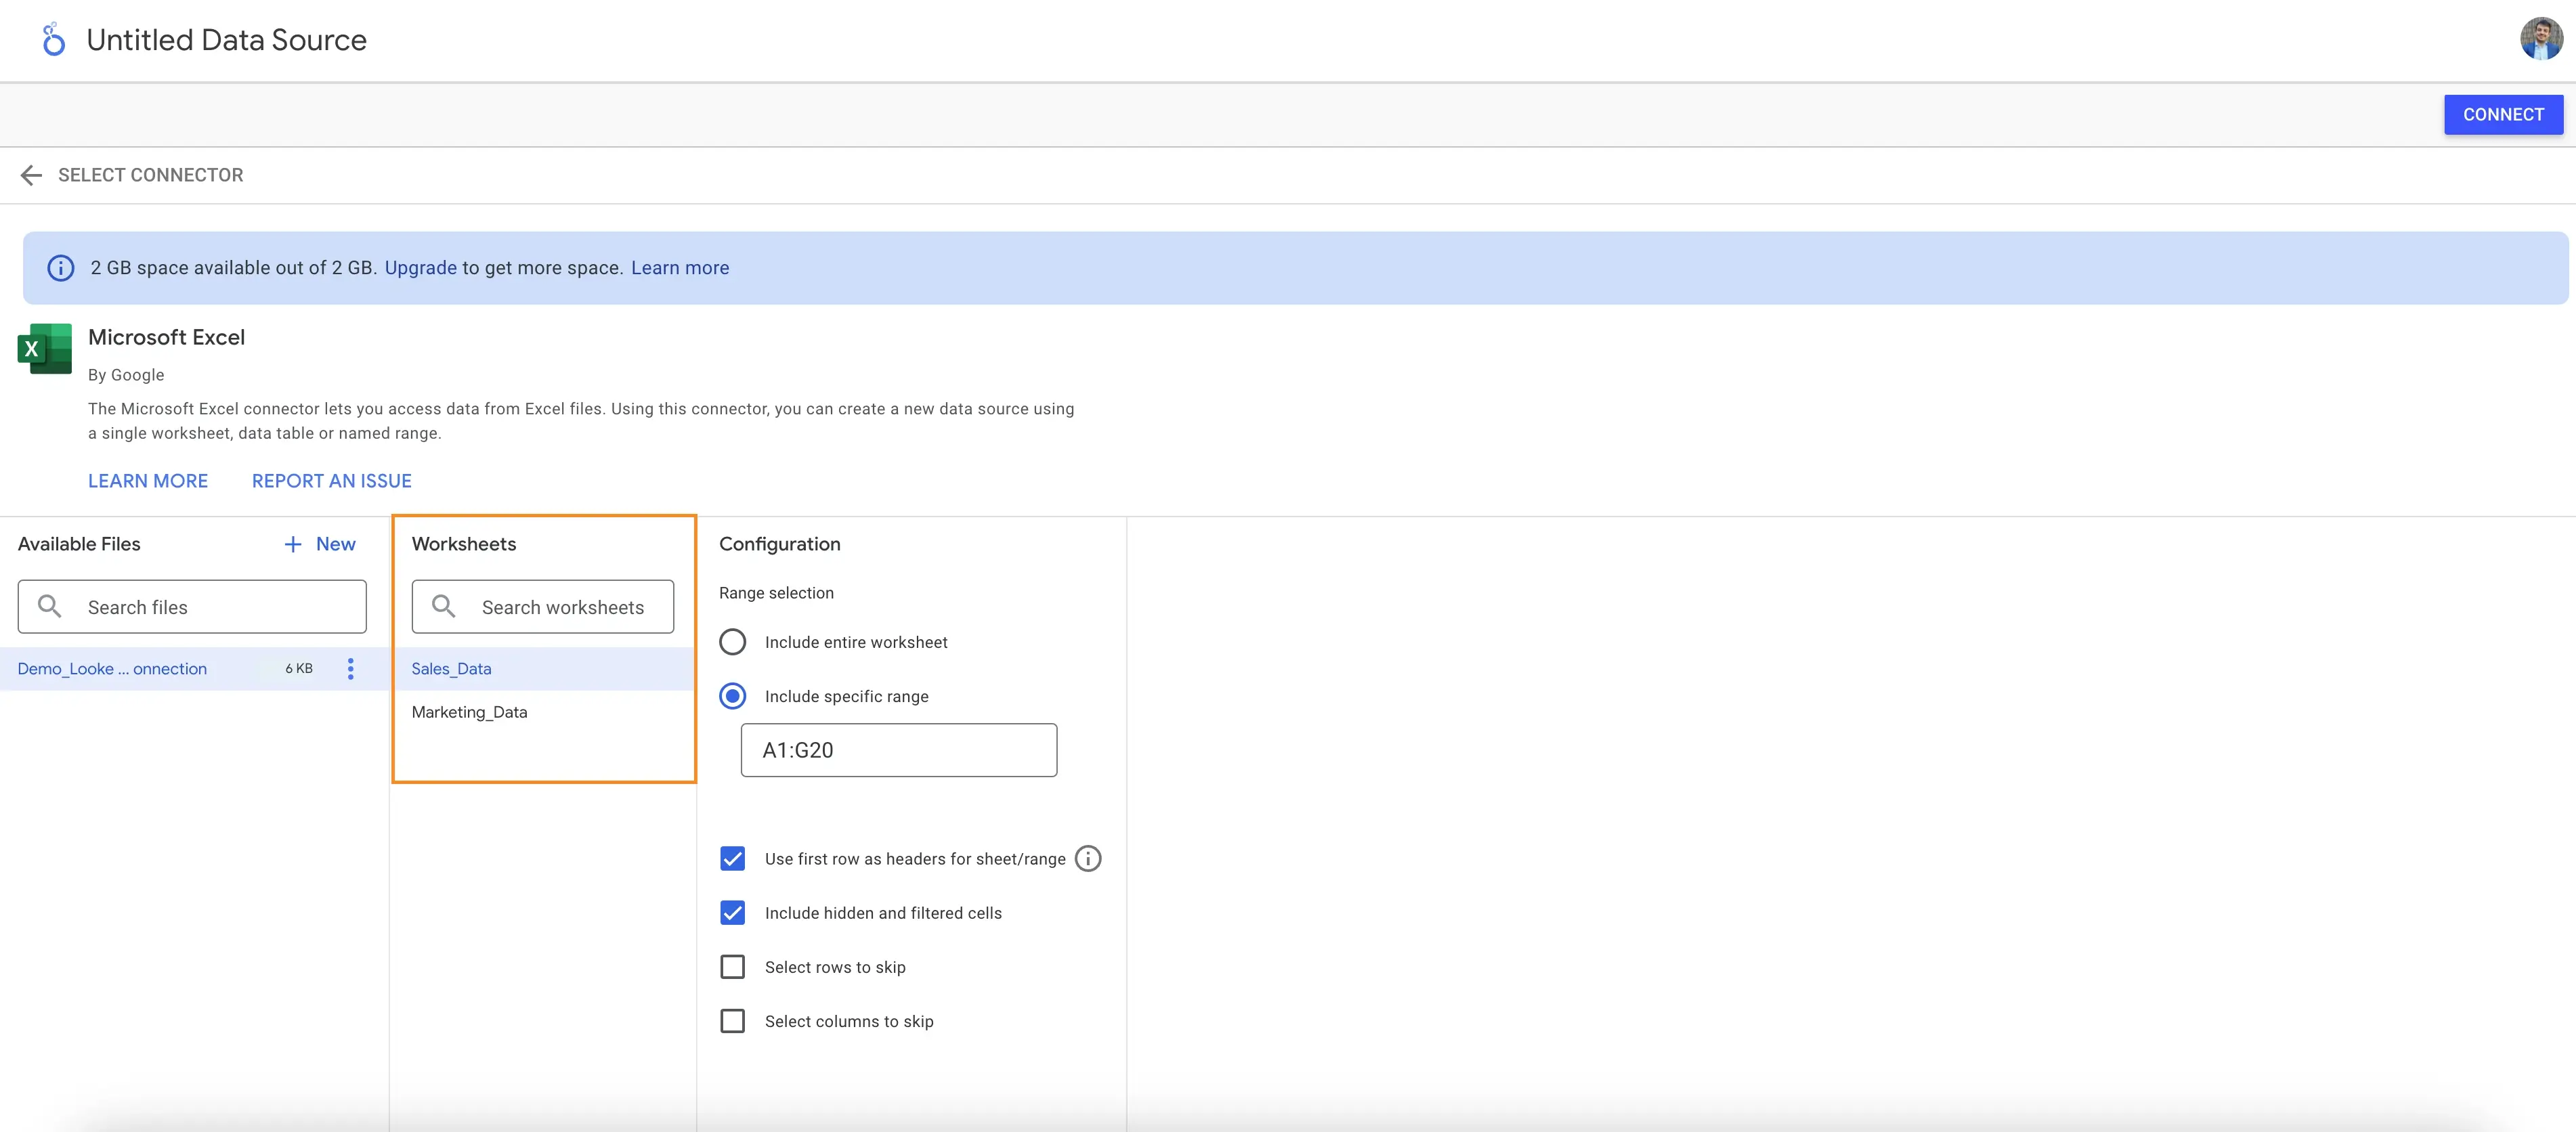
Image description: Selecting a specific worksheet or range in an Excel file to use as a data source in Looker Studio.
- Choose the specific worksheet you want to connect as your data source.
- Note: Each worksheet is treated as an individual data source. If your Excel file contains multiple sheets, you will need to repeat the connection process for each sheet.
- Refine your selection by:
- Using the first row as headers for field names.
- Including hidden or filtered cells if necessary.
- Specifying a range of cells (e.g.,
A1:Z50) for a more focused dataset.
6. Configure Your Data Source
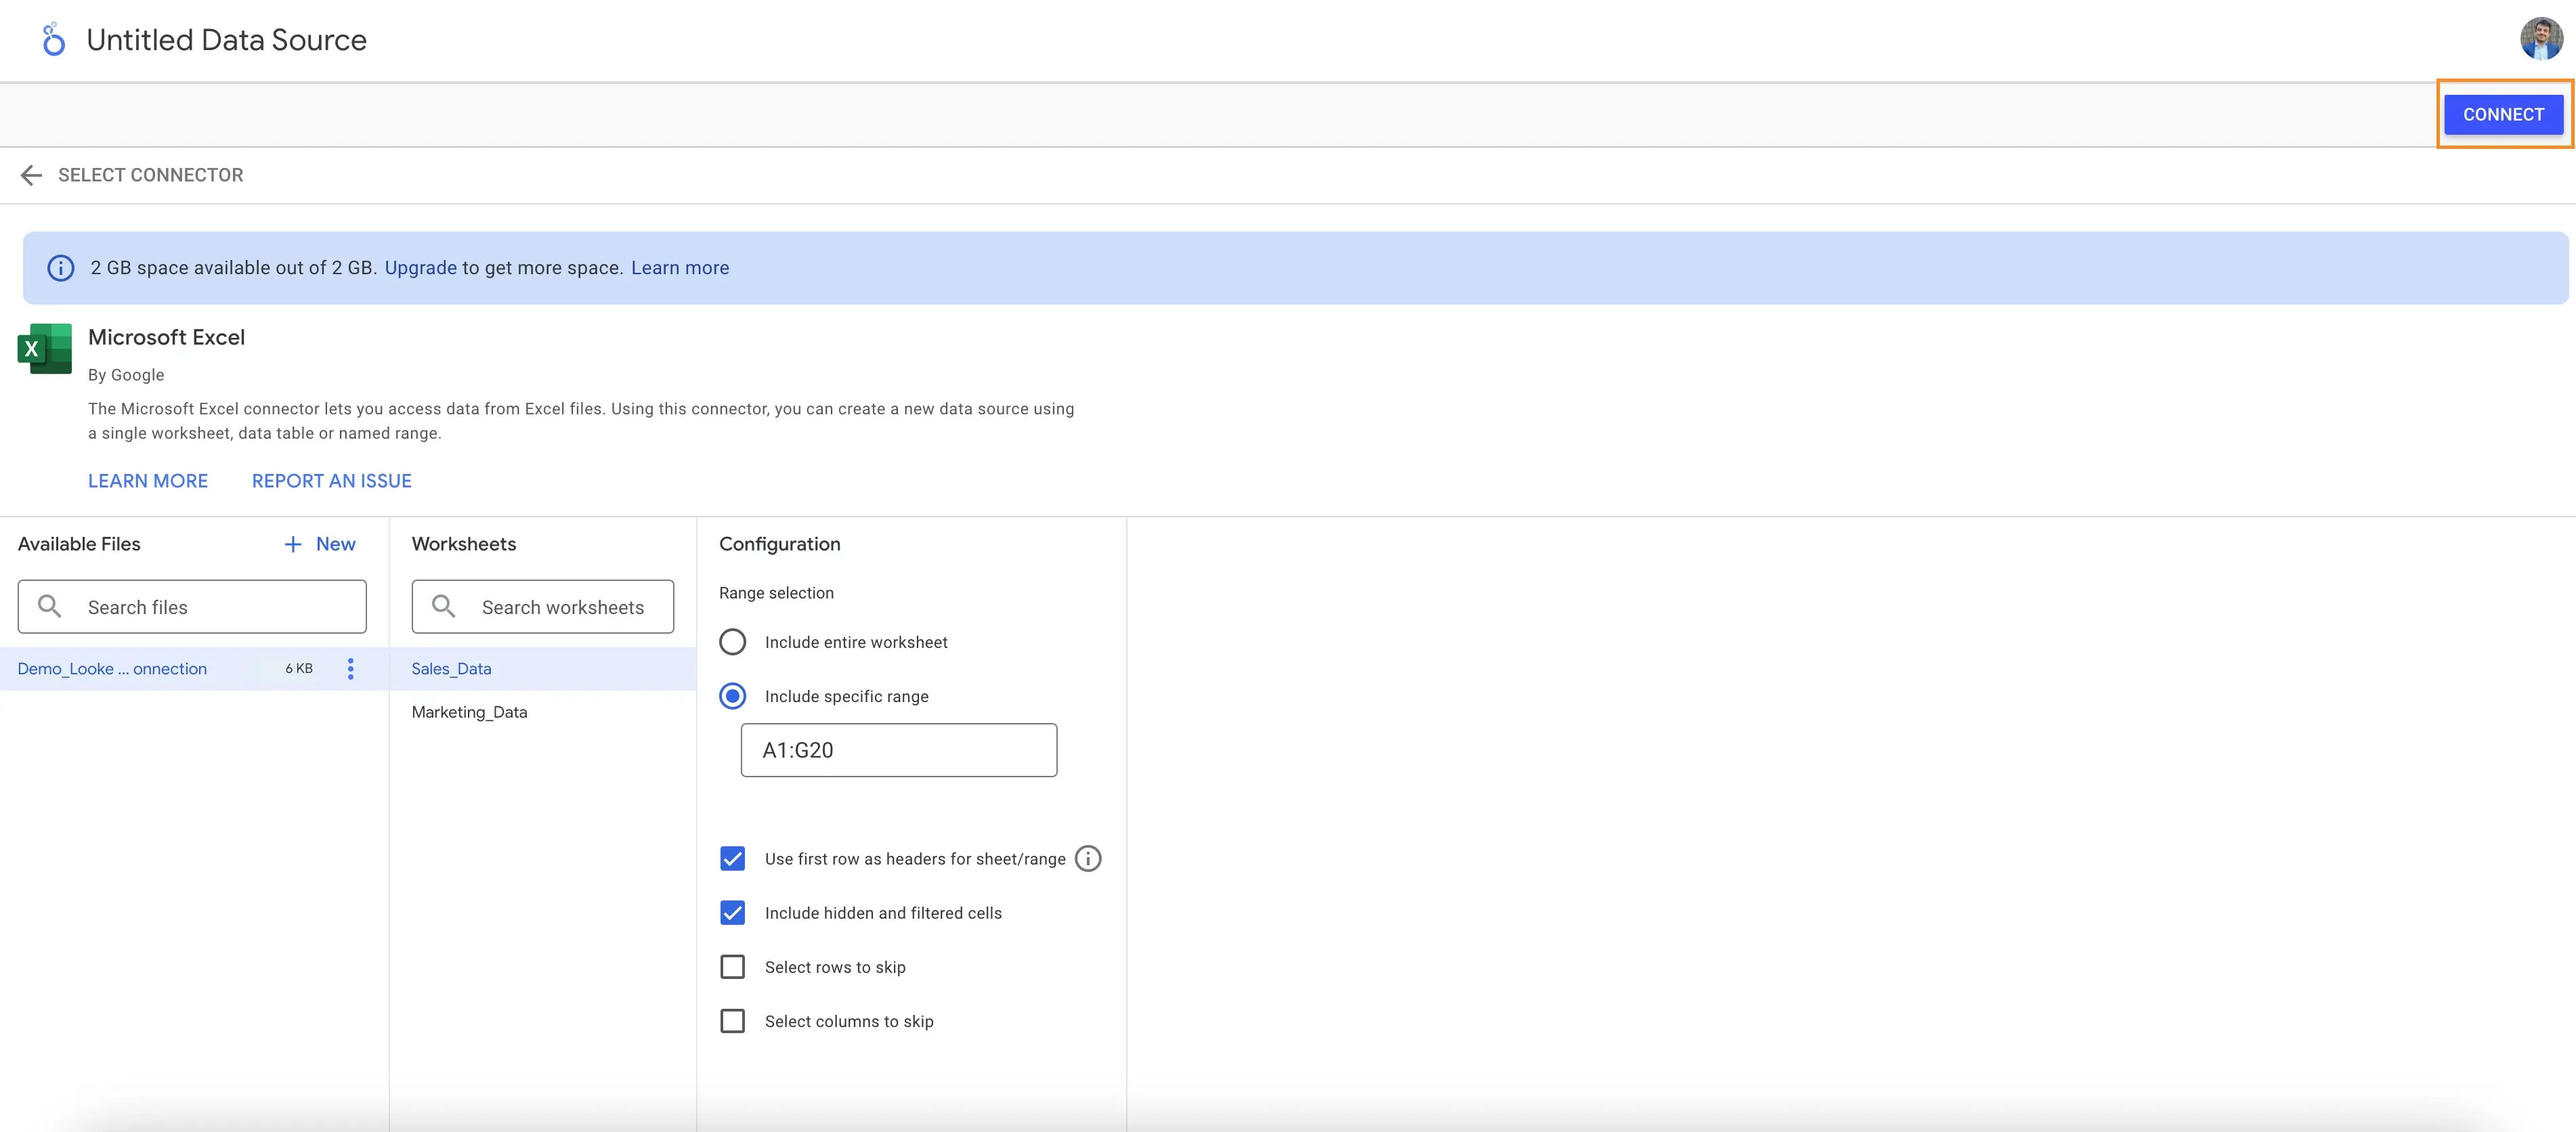
Image description: Configuring the data source in Looker Studio by renaming fields, adjusting data types, and setting up calculated fields.
- Once connected, Looker Studio will display the Fields Panel.
- In this panel, you can:
- Rename fields to improve clarity.
- Add calculated fields to derive new metrics.
- Adjust data types, such as converting text to numbers.
- Click CONNECT to save your data source settings.
7. Create Your First Report
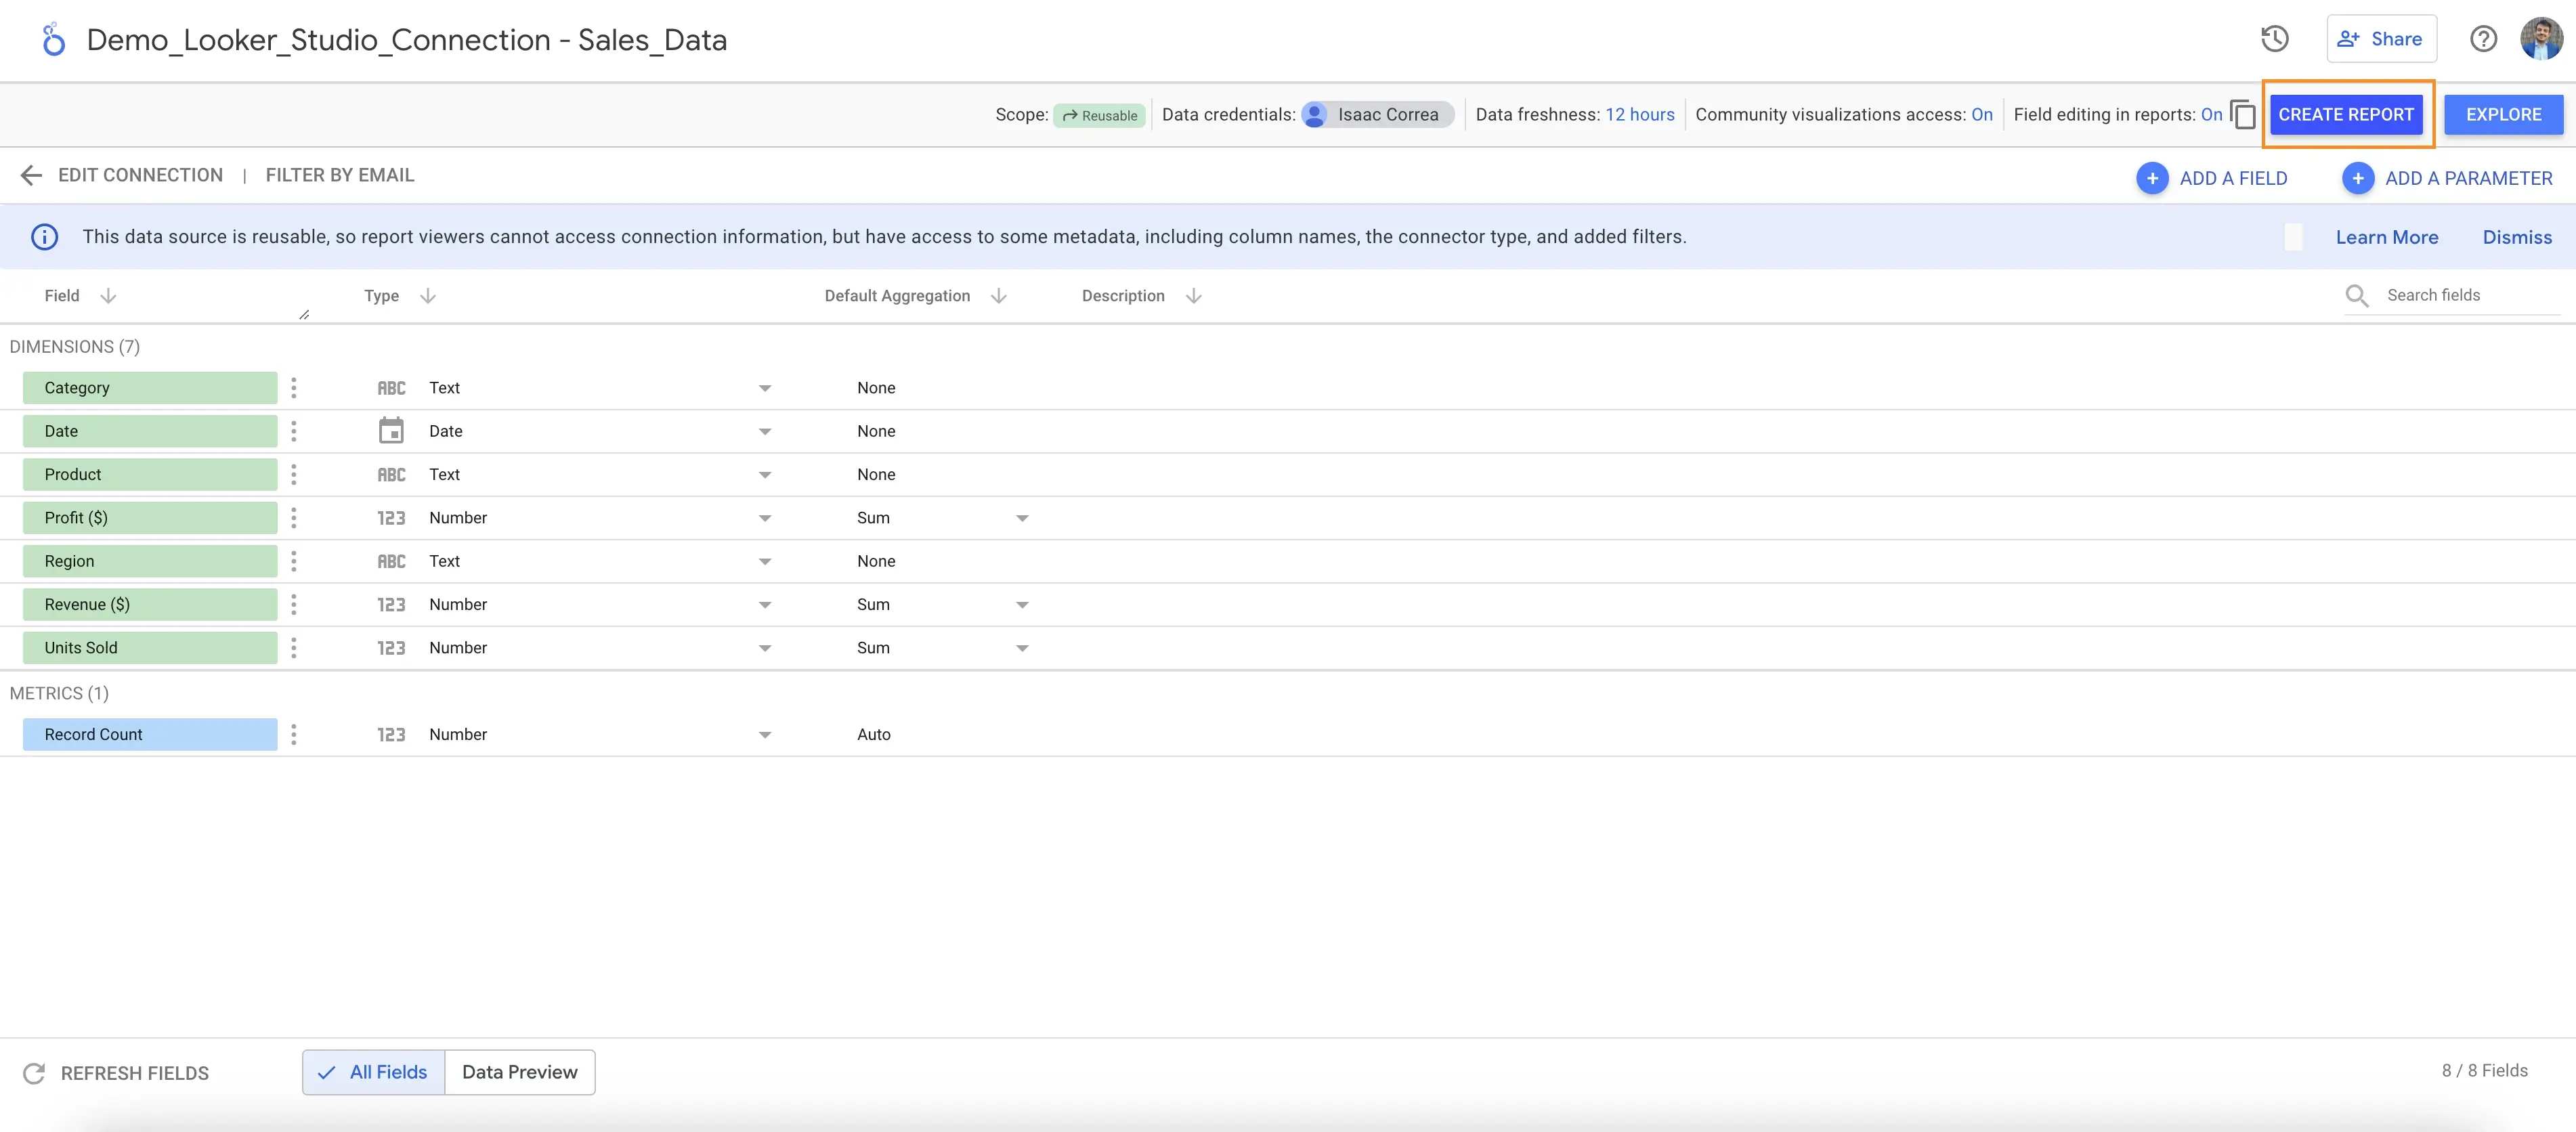
Image description: A completed Looker Studio report using Excel data, showcasing interactive visualizations.
- Click the Create Report button in the top-right corner.
- Add your Excel data source to the blank report.
- Start building your dashboard by dragging fields into charts, tables, or scorecards.
Pro Features for Power Users
Upgrading to Looker Studio Pro unlocks advanced capabilities for Excel integration:
- More Storage: Store up to 5 GB of Excel data sources (compared to 2 GB on the free plan).
- Seamless Downgrades: If you downgrade from Pro, existing files remain accessible, but new uploads must meet the 2 GB limit.
- Field Editing in Reports: Customize data fields directly within your reports for faster iterations.
Pro users enjoy more flexibility and capacity, making it easier to manage large datasets and collaborate effectively.
Common Limitations
When using the Microsoft Excel connector, keep in mind:
- File Size: Each file must be under 100 MB.
- Compatibility: Password-protected files, macros, and pivot tables are not supported.
- Data Consistency: Columns in your dataset must have the same type of data (e.g., all numbers or all text).
- Separate Data Sources: Each worksheet in an Excel file is treated as a unique data source.
These limitations ensure smooth integration and prevent errors during setup.
Why Looker Studio + Excel Is a Game-Changer
By integrating Microsoft Excel with Looker Studio, you unlock:
- Automation: Your data updates automatically, saving hours of manual work.
- Clarity: Stunning visuals reveal insights at a glance.
- Collaboration: Dashboards are easy to share and accessible to your entire team.
"From spreadsheets to storytelling: Looker Studio turns raw data into meaningful insights."
Ready to Transform Your Reports?
Take your Excel spreadsheets to the next level with Looker Studio. Whether you’re tracking sales, analyzing campaigns, or managing inventory, this integration is the key to smarter, faster decision-making.