19 of November of 2024
Customizing Looker Studio Dashboards: Colors and Logos Made Easy

Isaac Correa
Looker Studio Templates
SEO & Marketing Dashboards
Create professional, branded dashboards by adding custom colors and client logos to enhance your reports.
How to Customize Dashboards in Looker Studio with Client Colors and Logos
Creating a professional, branded dashboard for each client in Looker Studio enhances the quality of your reports.
Adding custom colors and logos makes dashboards look more polished and client-aligned, increasing their value.
This guide will take you through every step to personalize Looker Studio dashboards, ensuring that your reports look professional and align with your client’s branding.
Step 1: Changing Dashboard Colors
To adjust colors for your client’s dashboard, follow these steps:
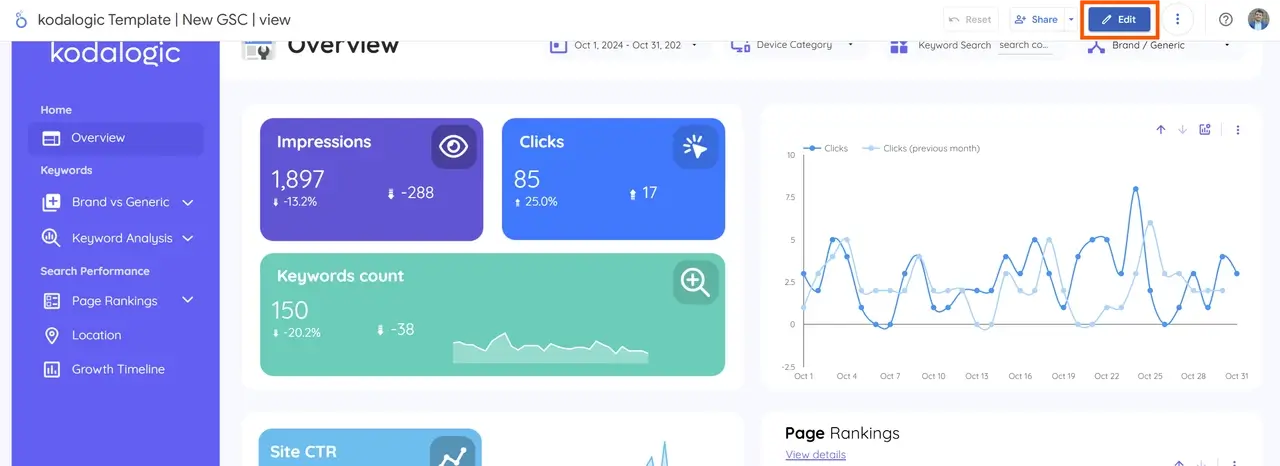
- Enter Edit Mode:
- If this is your first report, edit mode will unlock automatically when you start customizing.
- Go to "Theme and Layout":
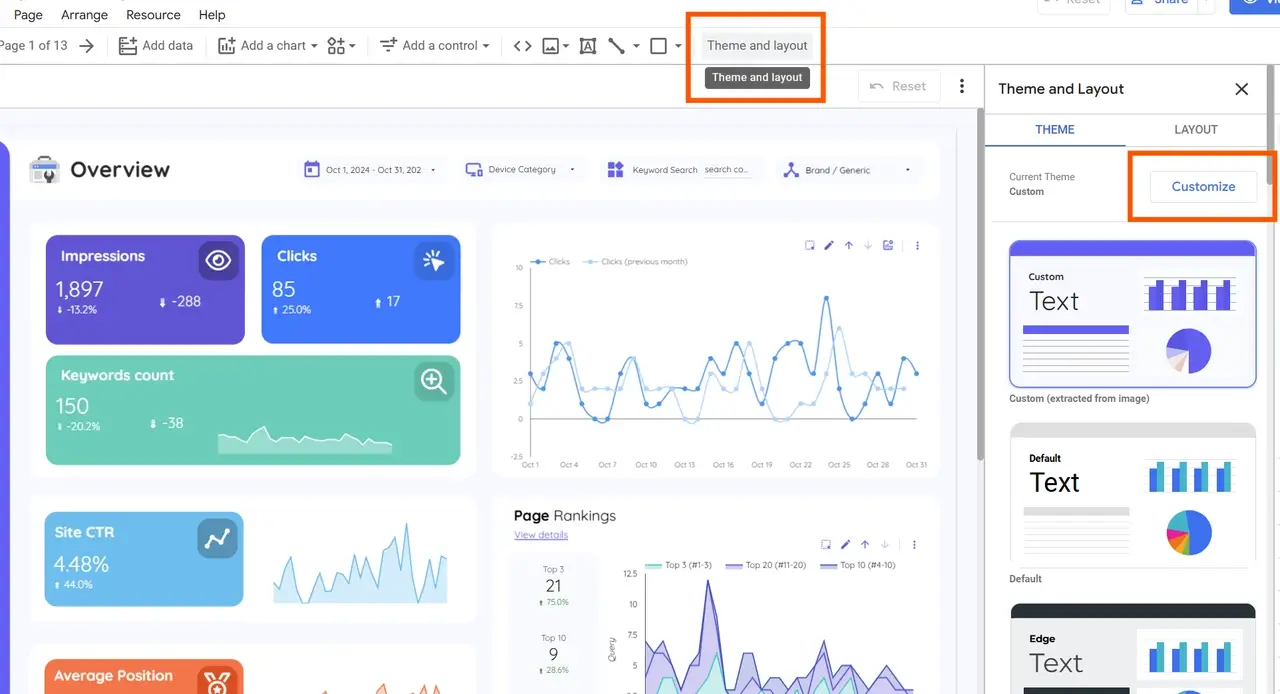
- In the right-hand sidebar, a pop-up will open with two sections: Theme and Layout.
- Stay in the Theme section, and select the first option called "Customize".
- Selecting Main Colors:
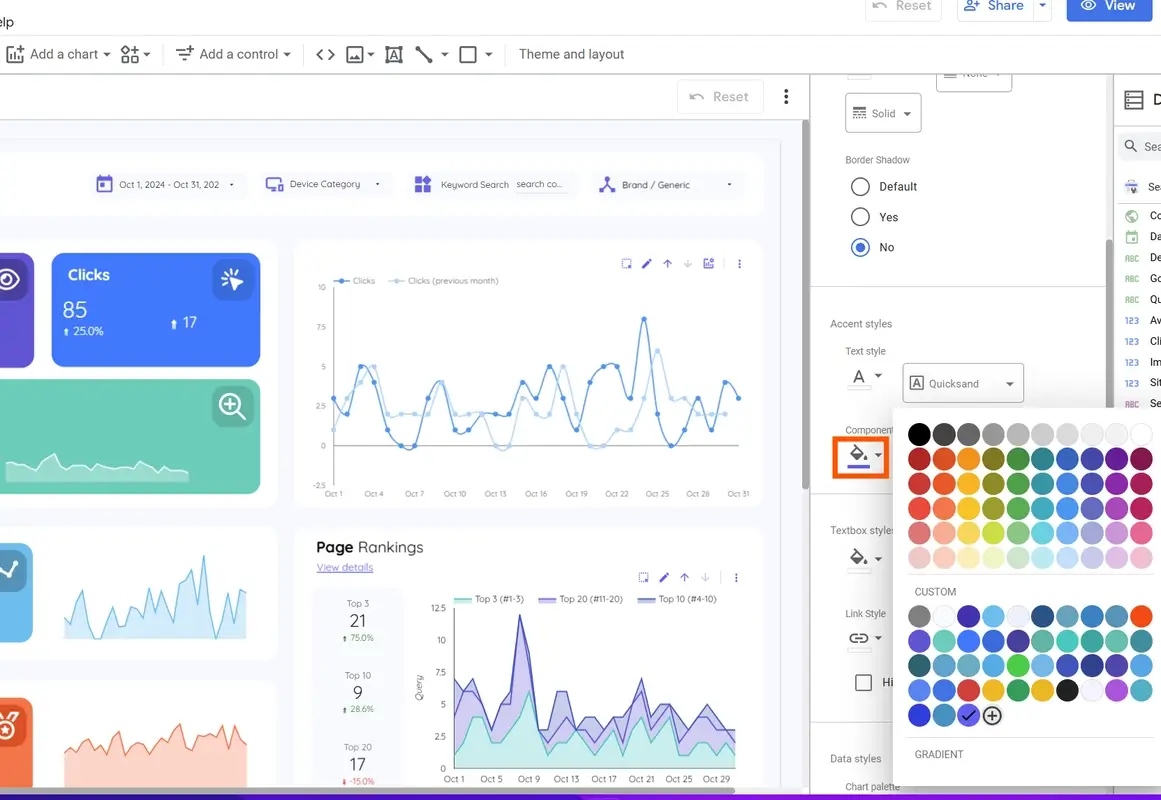
- You’ll find many customization options, but we’ll focus on the ones that adjust the main navigation colors.
- Scroll to "Component Background": This is the primary color for the dashboard, setting the global background color across the report.
- Choose a color that aligns with your or your client’s brand.
- Setting a Secondary (Contrast) Color:
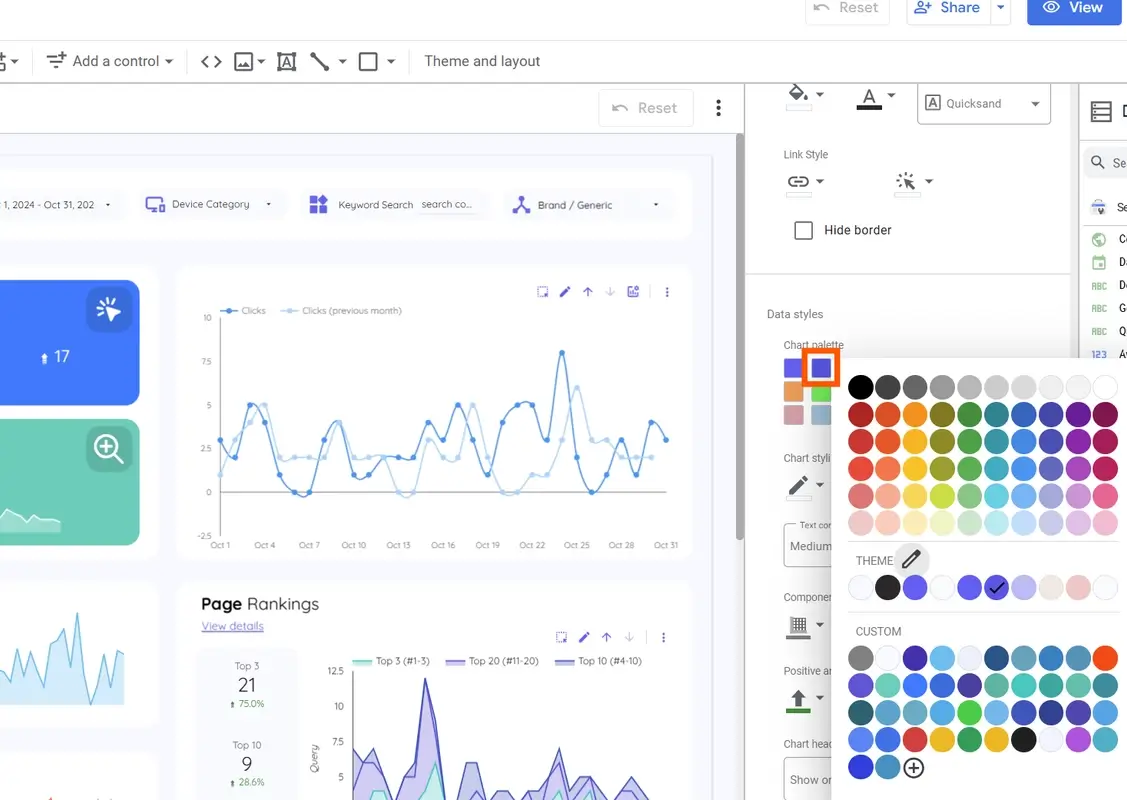
- To adjust the secondary color, go to the "Data Styles" section in the pop-up.
- The second color option here controls the secondary color, which should contrast well with the main color for visual balance.
- We recommend using complementary colors and avoiding white, as it may make text difficult to read.
| Color Element | Function | Recommendation |
|---|---|---|
| Component Background | Sets the main dashboard color | Choose brand-aligned, non-distracting tones |
| Secondary Color | Adds contrast for visual clarity | Use a complementary color to the main color |
Tip: Kodalogic templates make it easy to change colors quickly, keeping a professional look across all client dashboards.
Step 2: Adding the Company Logo
Adding the client’s logo is essential for creating a polished, branded report. Here’s how to add and adjust the logo:
- Upload the Logo:
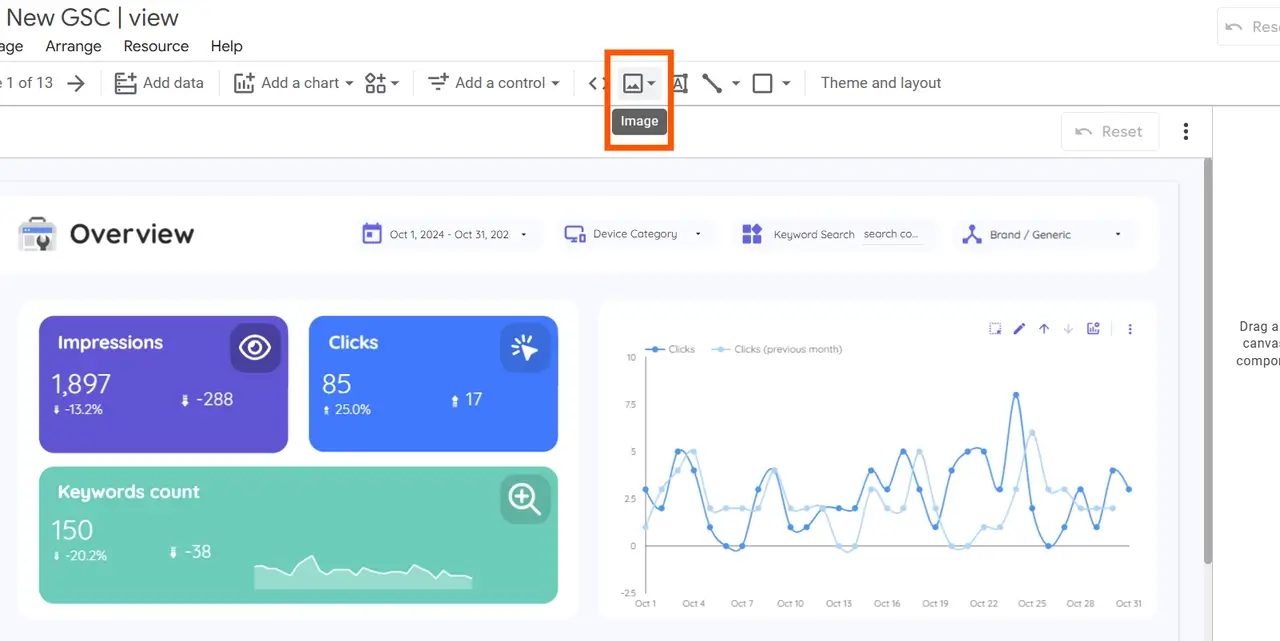
- In edit mode, go to the toolbar and select the image icon (a photo symbol).
- You can upload a logo from your computer or via URL.
-
Image Format Recommendations:
- For optimal quality, use logos in SVG format (to keep resolution sharp), or at minimum PNG (to ensure a transparent background).
-
Making Backgrounds Transparent:
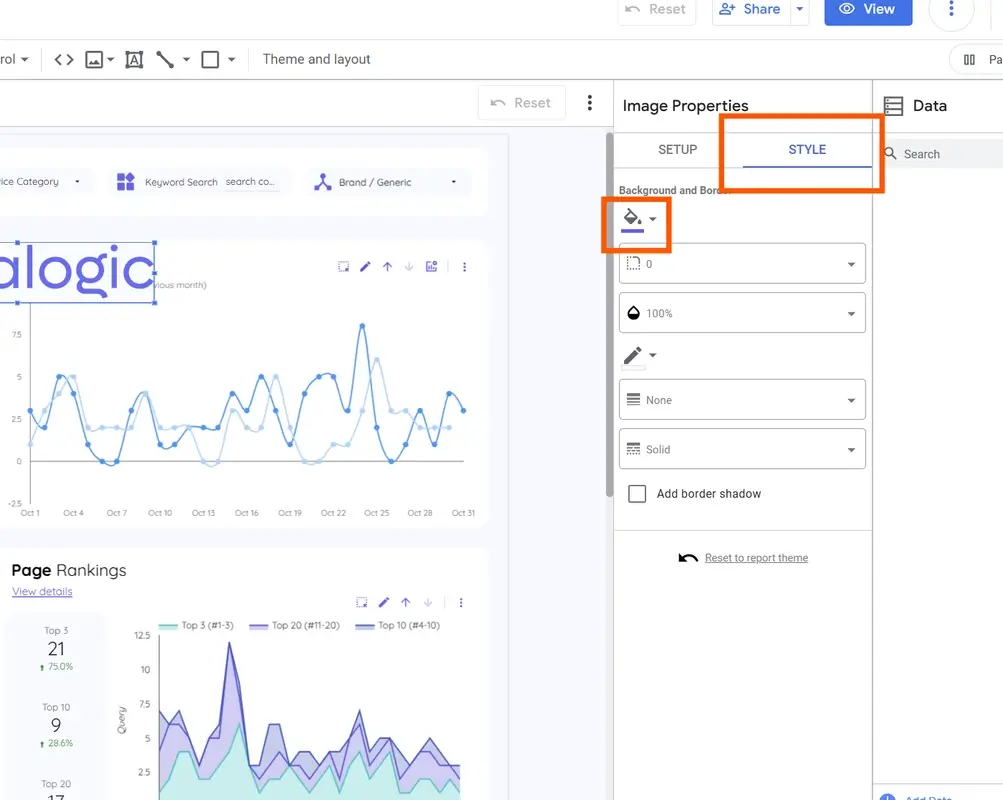
- If the logo has a white background, click on the uploaded image to open Image Properties on the left.
- In Image Properties, go to the "Style" tab and click the bucket icon (for background color).
- Select transparent as the color to remove the background.
- Adjusting Size and Position:
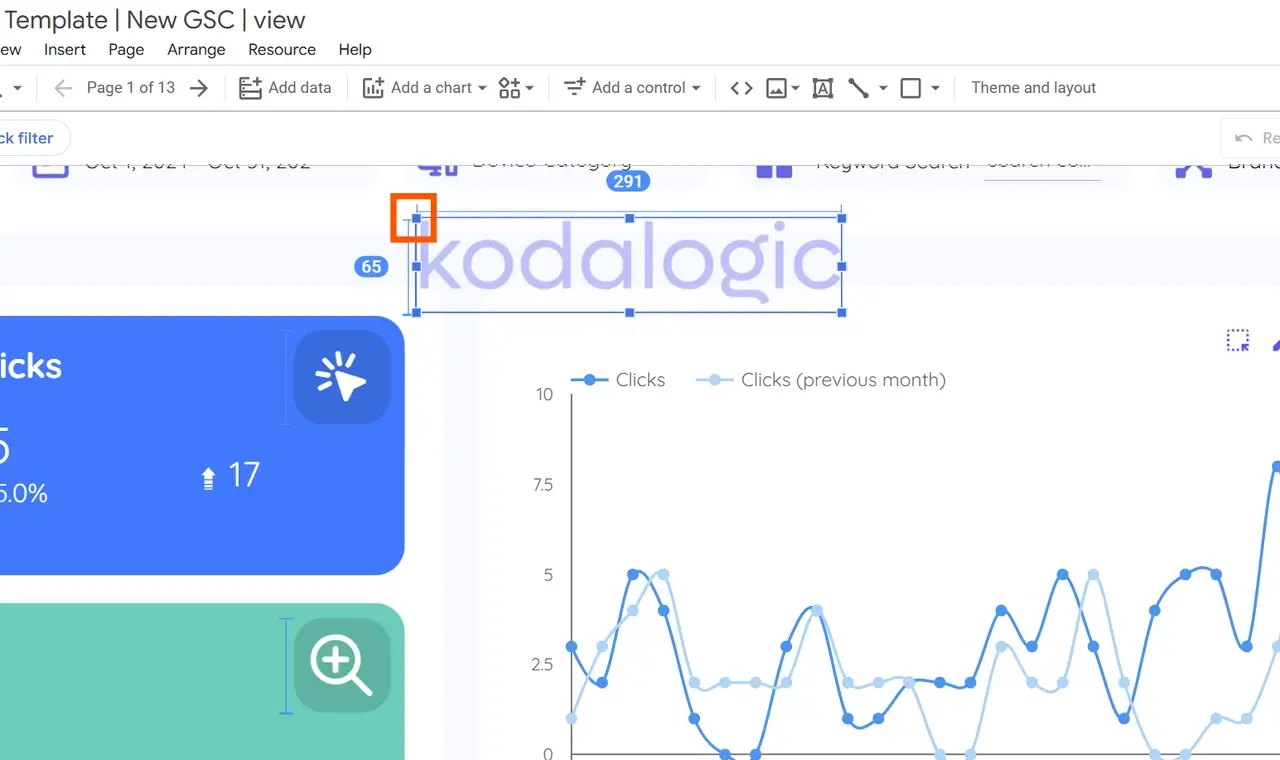
- Resize and position the logo as desired, typically in the header or a prominent corner.
- Replace the default Kodalogic logo with your client’s by deleting it using the Delete key or right-click and select Delete.
Tip: After positioning the client logo on the first page, copy it with Ctrl + C (or Cmd + C on Mac) for easy placement on other pages.
Step 3: Replicating the Logo Across All Pages
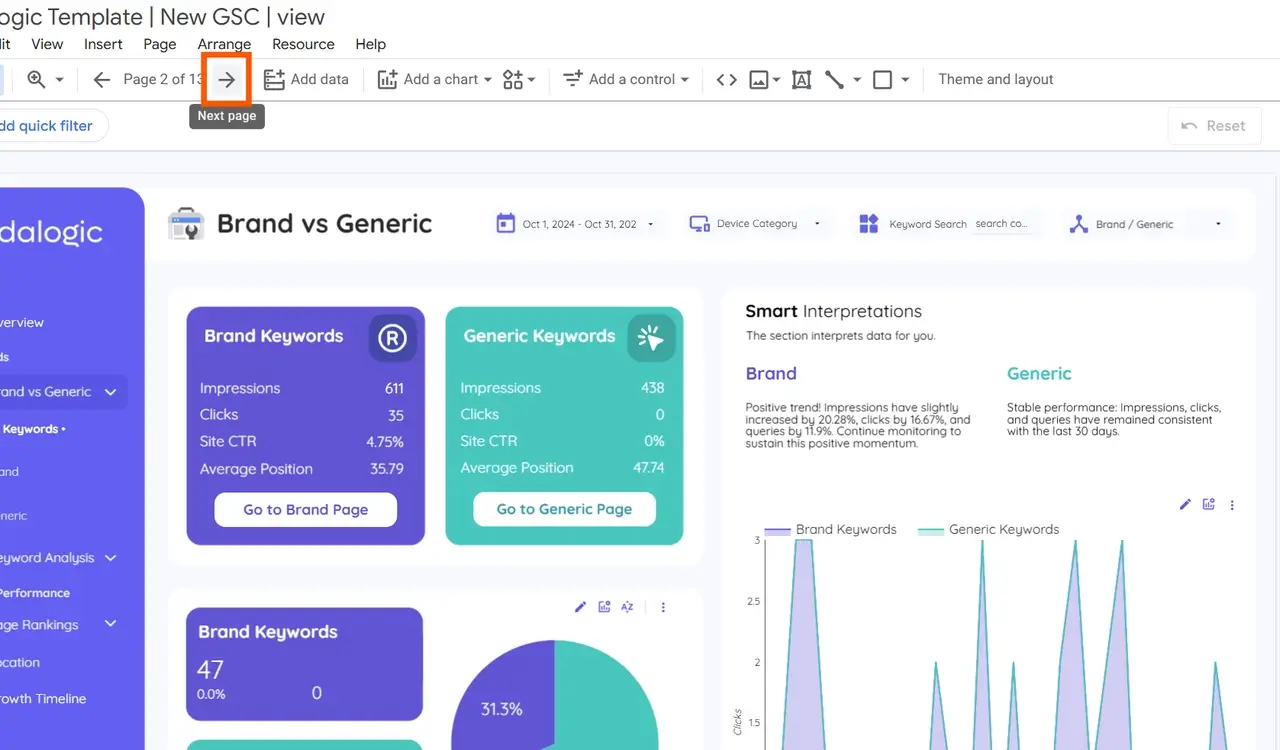
To maintain a consistent look across the entire report, repeat these steps on every page:
-
Copy the Logo:
- Once you have the logo positioned and resized on the first page, select it and use Ctrl + C (or Cmd + C on Mac) to copy.
-
Paste on Subsequent Pages:
- Move to the next page in your dashboard (using the page selector at the top).
- Delete the default logo, then paste the client logo using Ctrl + V (or Cmd + V on Mac).
-
Repeat as Needed:
- Continue this process for each page to ensure brand consistency throughout the entire report.
Final Steps: Review and Finalize the Dashboard
After customizing colors and logos, do a final review:
- Check Visual Consistency: Make sure all pages match in color, logo placement, and font choices.
- Preview for Readability: Ensure colors and contrast are easy on the eyes and data remains readable.
- Ready for Delivery: In less than 3 minutes, you’ll have a dashboard ready to schedule for email delivery, provide access to clients, or use internally for data analysis.
Summary: Customizing Dashboards with Kodalogic Templates in Looker Studio
By following these simple steps, you can transform a standard dashboard into a branded, client-specific report that conveys professionalism and attention to detail.
Kodalogic’s templates make customization straightforward, allowing you to personalize dashboards efficiently without compromising on quality.
Ready to enhance your reporting? Kodalogic’s templates help you deliver impactful, customized dashboards in just minutes.