11 of January of 2025
How to Share Looker Studio Dashboards Effectively

Isaac Correa

Easily share your dashboards and manage user access with Looker Studio’s sharing settings.
Sharing Looker Studio Dashboards: Seamless, Effortless, Instant
Imagine turning raw data into decisions faster than ever before.
At Kodalogic, we believe in more than just sharing reports—we believe in creating experiences that inspire clarity and confidence. With Looker Studio templates, sharing insights is no longer a technical hurdle but an elegant extension of your workflow.
Here’s everything you need to know about sharing Looker Studio dashboards, enhanced with Kodalogic’s approach to simplicity and aesthetic excellence.
Why Sharing Transforms Your Workflow

Sharing your Looker Studio dashboards isn’t just a task—it’s the key to empowering smarter decisions across your team, clients, and stakeholders. Done right, it bridges gaps, aligns strategies, and makes everyone part of the solution.
What You’ll Achieve with Smarter Sharing
- Aligned Teams: Ensure everyone has real-time access to the insights they need.
- Better Client Relationships: Share results with clarity and style.
- Effortless Collaboration: Remove complexity, focus on decisions.
Learn more about why Looker Studio Pro is the go-to data tool for 2025 in our blog post here.
6 Ways to Share Looker Studio Dashboards
We’ve curated the ultimate sharing options to match every scenario. Whether you need instant links, scheduled updates, or embedded dashboards, Looker Studio Pro gives you the tools—and we help you maximize their potential.
1. Share with Public or Private Links
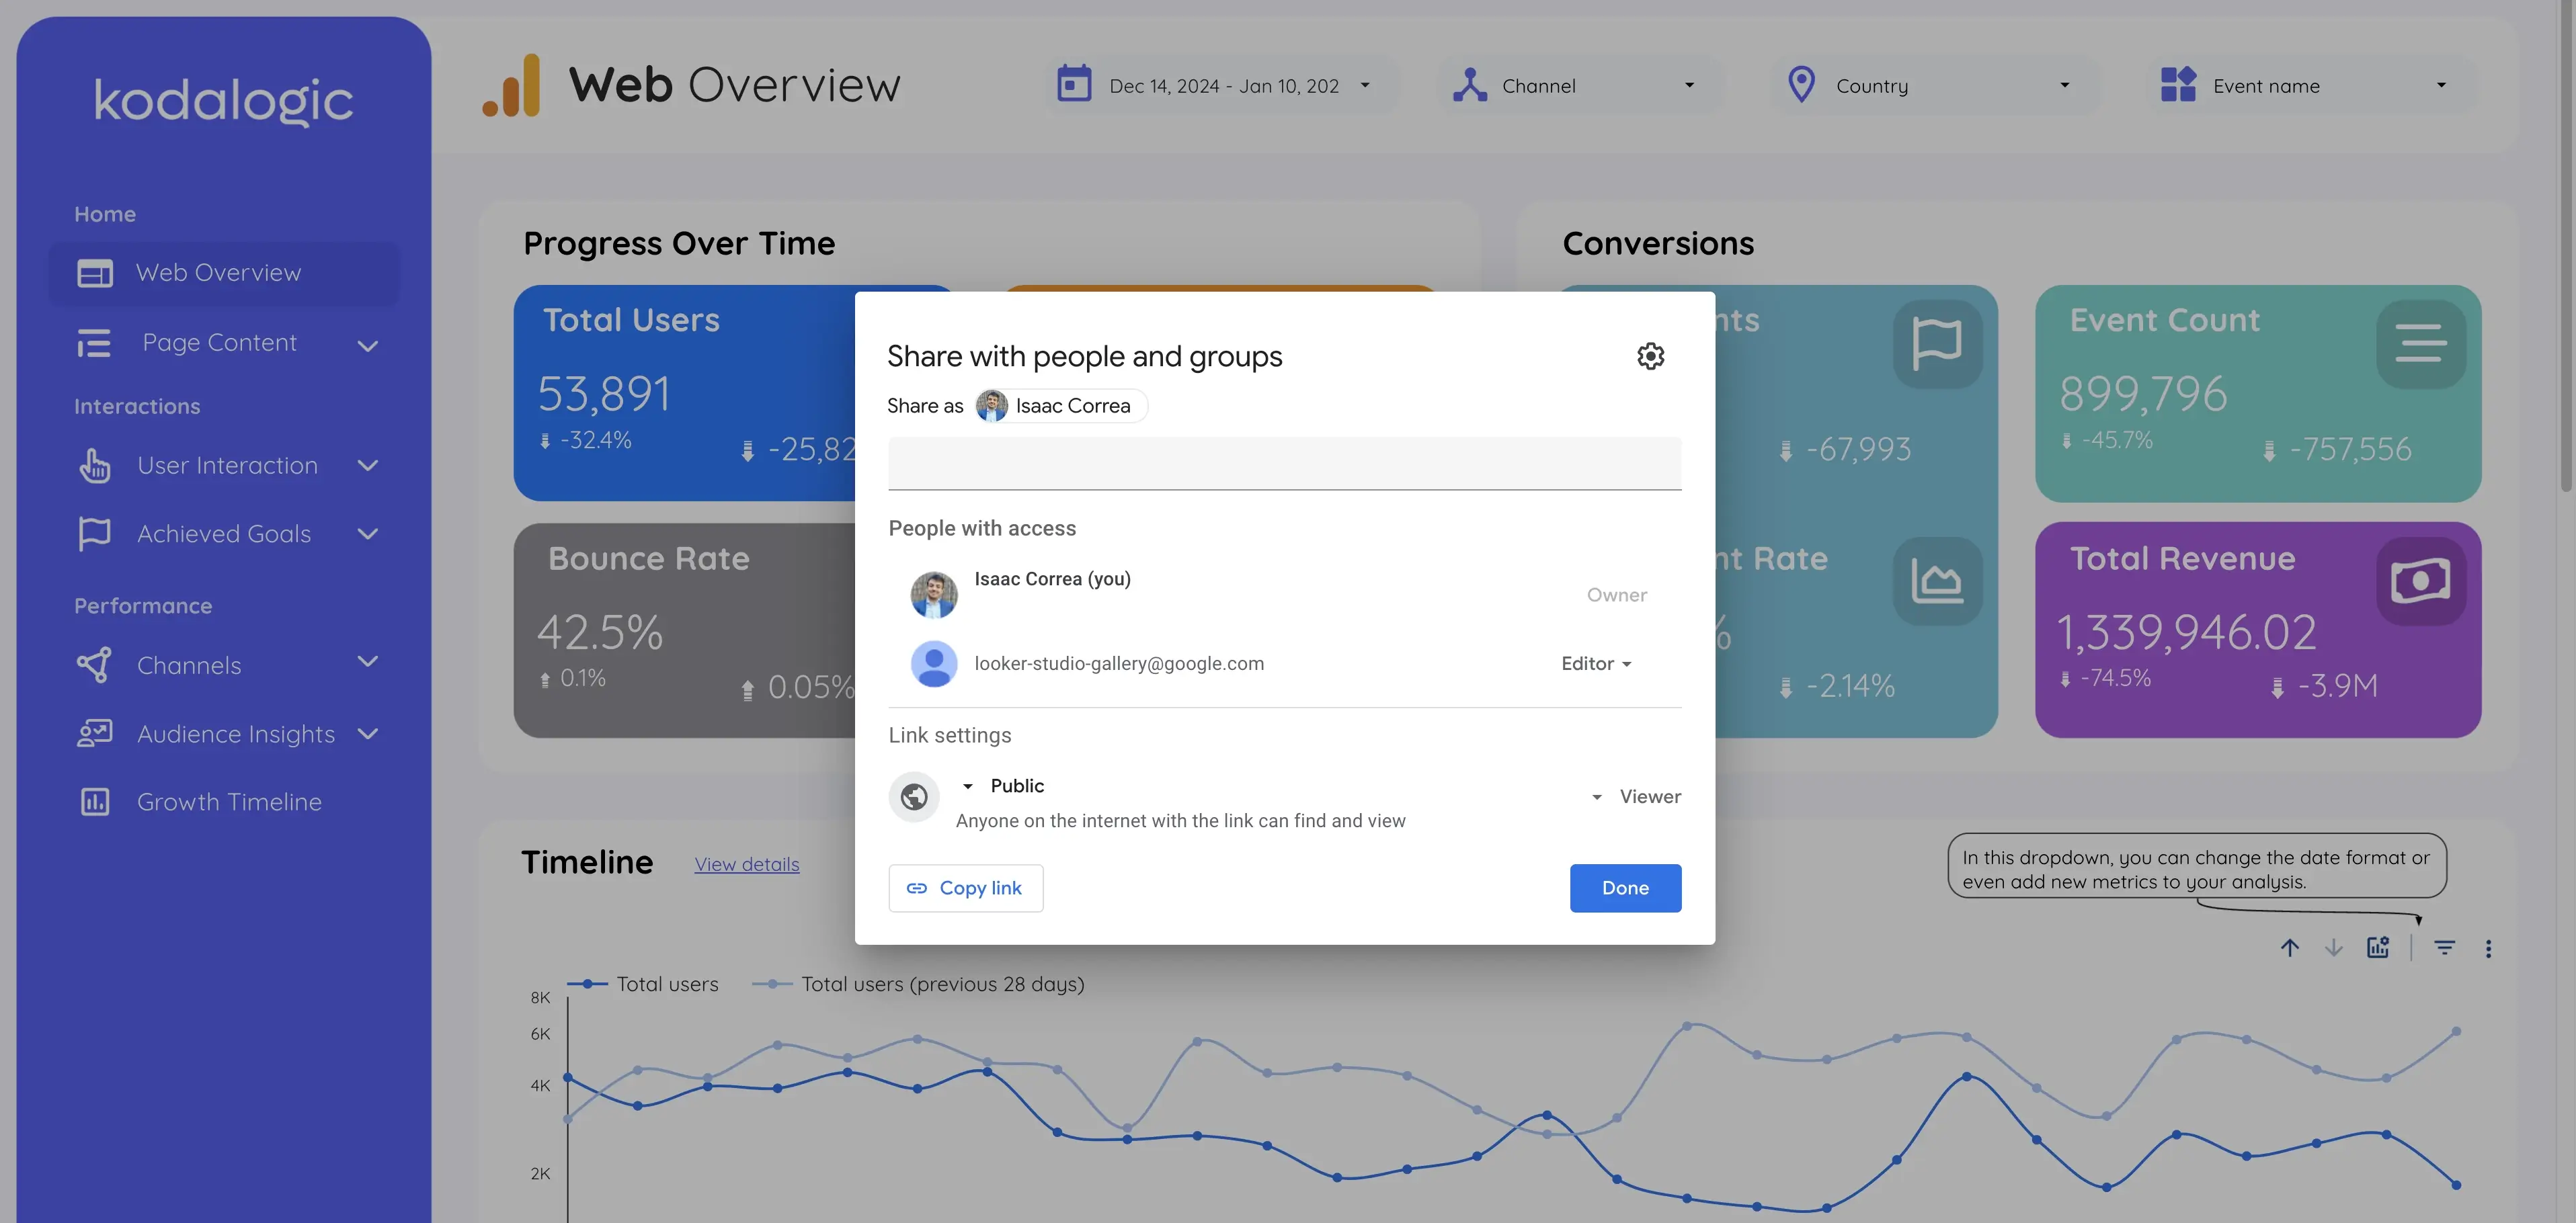
Sometimes, all it takes is a link. Whether it’s a restricted link for your team or a public one for broader sharing, Looker Studio adapts to your needs.
How It Works
- Click Share in the top-right corner.
- Choose link-sharing settings:
- Restricted: Only invited users can access.
- Domain-Restricted: Share with users in your organization.
- Unlisted: Anyone with the link can view (not discoverable).
- Public: Accessible to anyone.
- Copy the link and send it to your audience.
Dive deeper into the mechanics of embedding links in our step-by-step guide.
2. Invite Team Members to Collaborate
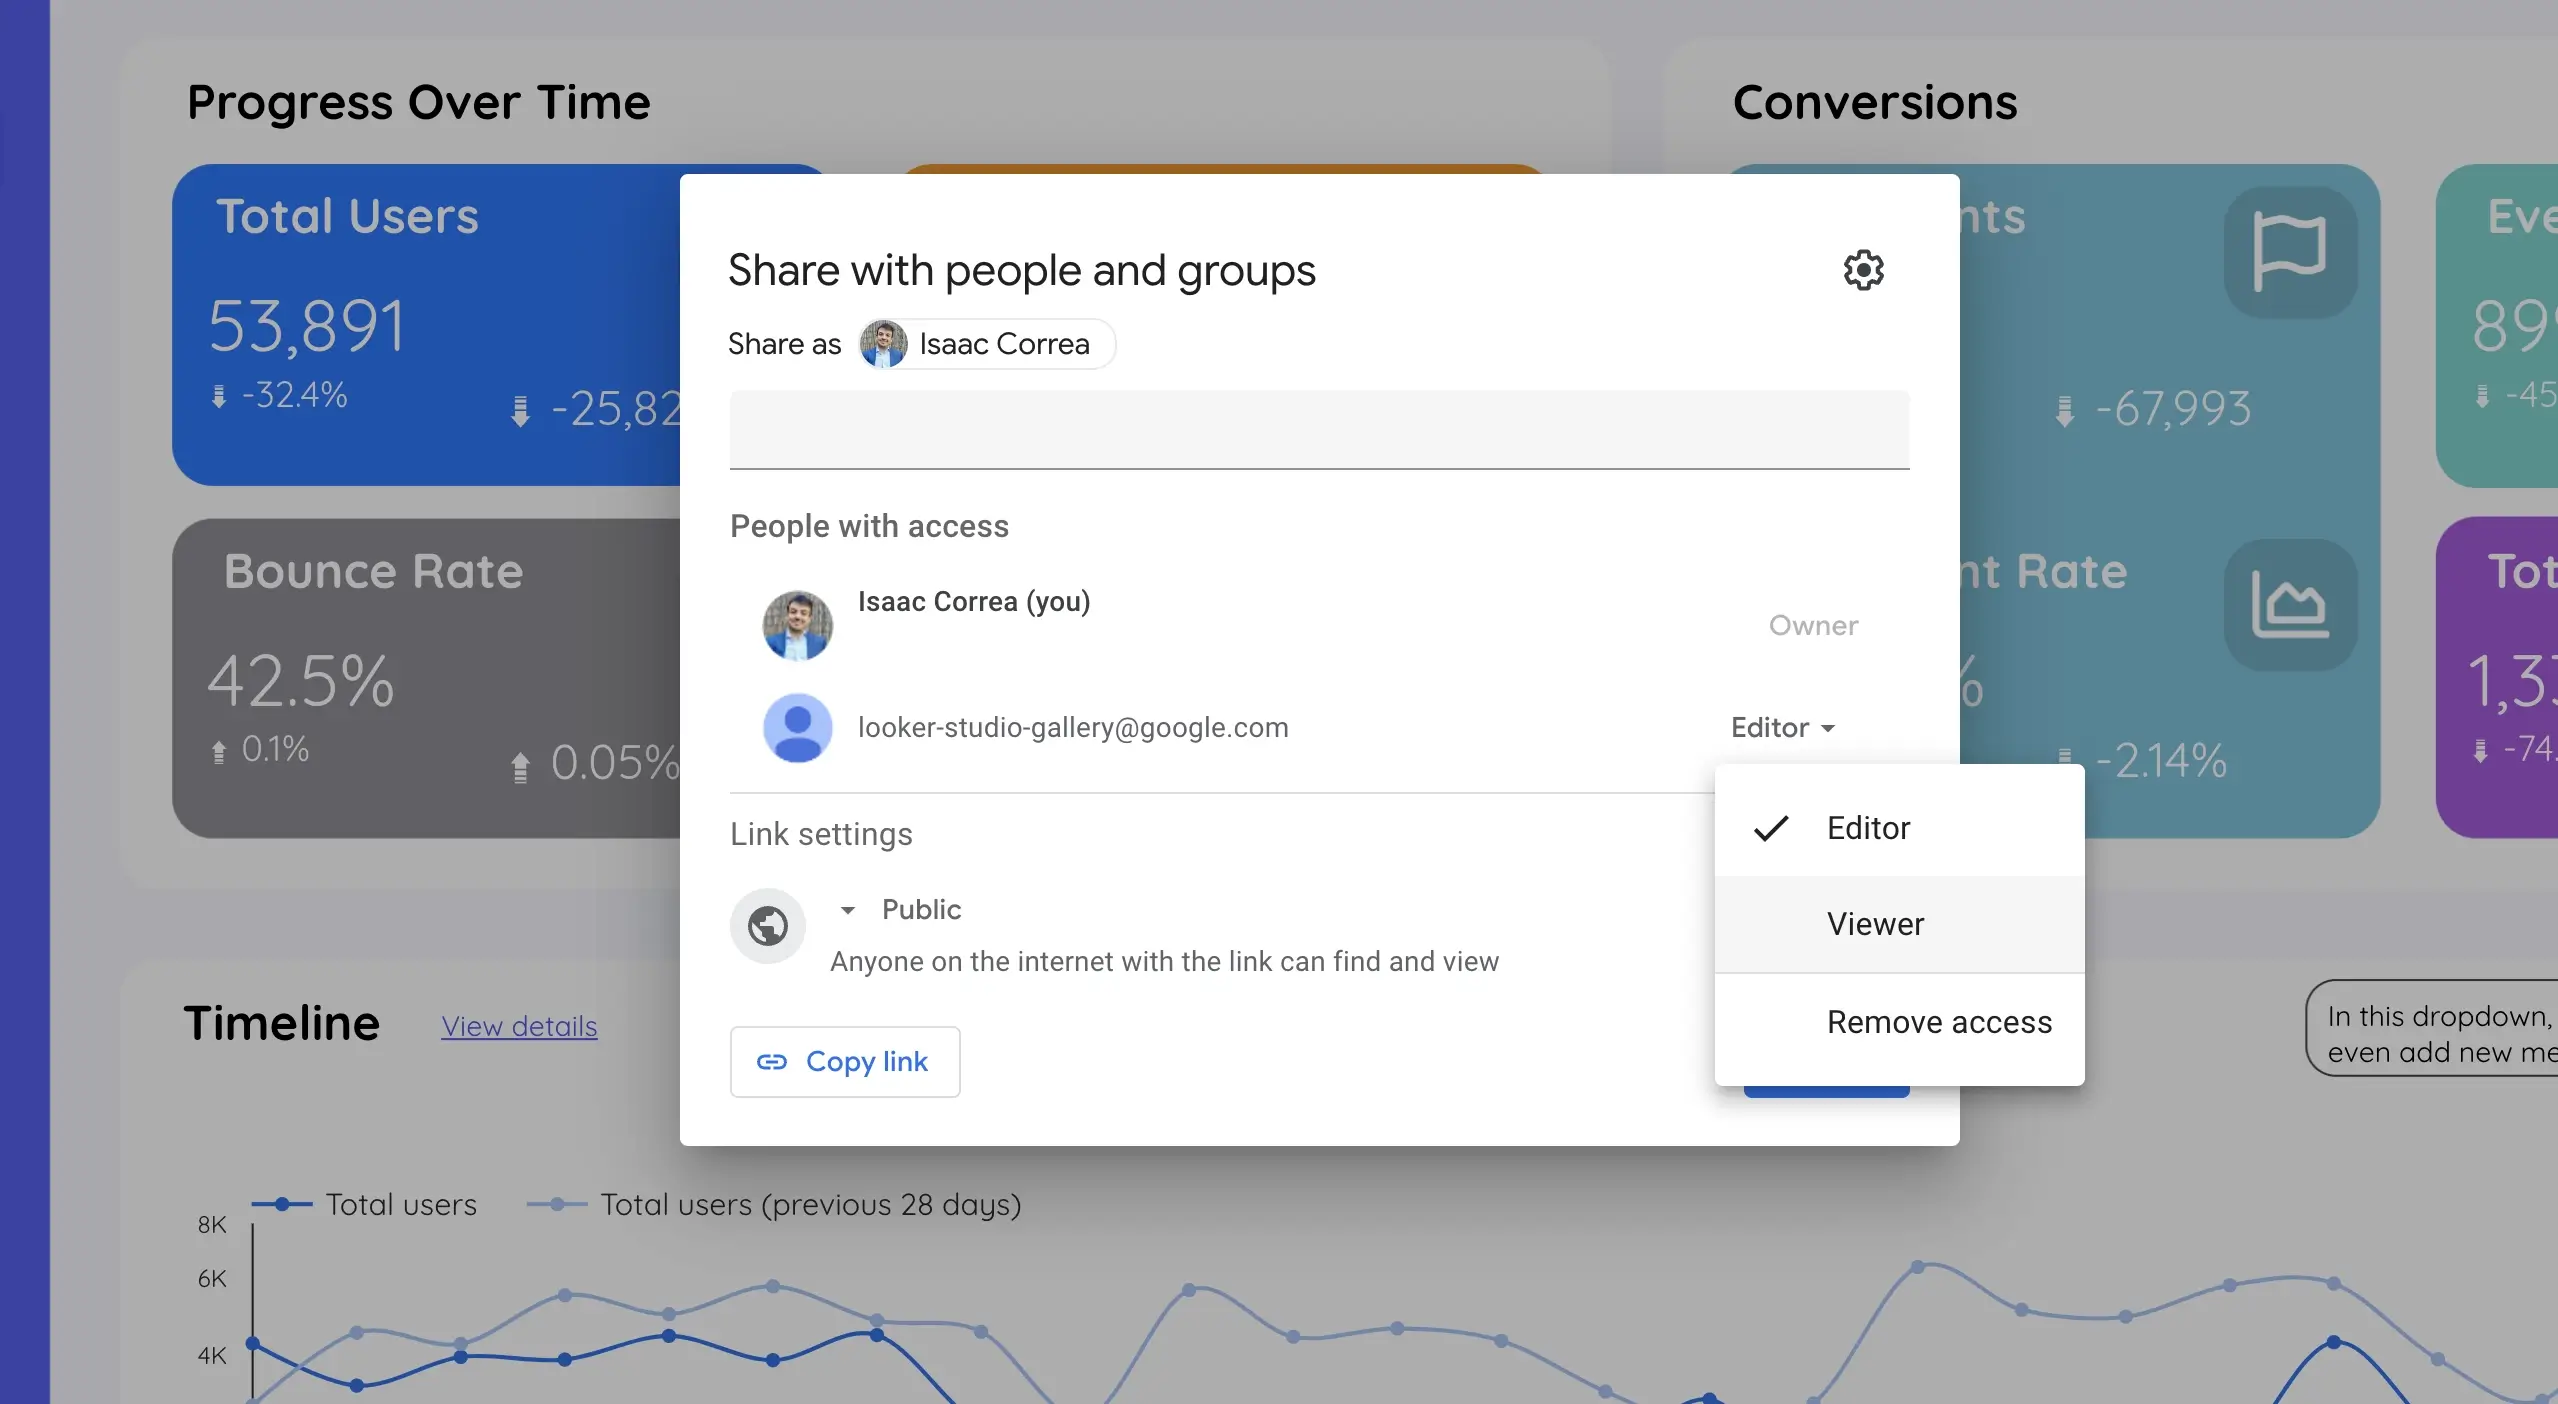
Collaboration flourishes when roles are clear. With Looker Studio, you can invite specific people to view or edit your dashboard, controlling who sees what.
Steps to Invite Collaborators
- Click Share and select Invite People.
- Enter email addresses and assign roles:
- Viewer: Access for reading and exploring.
- Editor: Full access to update and enhance dashboards.
- Send the invite—your collaborators are now part of the process.
Example: Share editable versions of your Looker Studio templates with your team while granting view-only access to clients.
3. Export Dashboards as PDFs
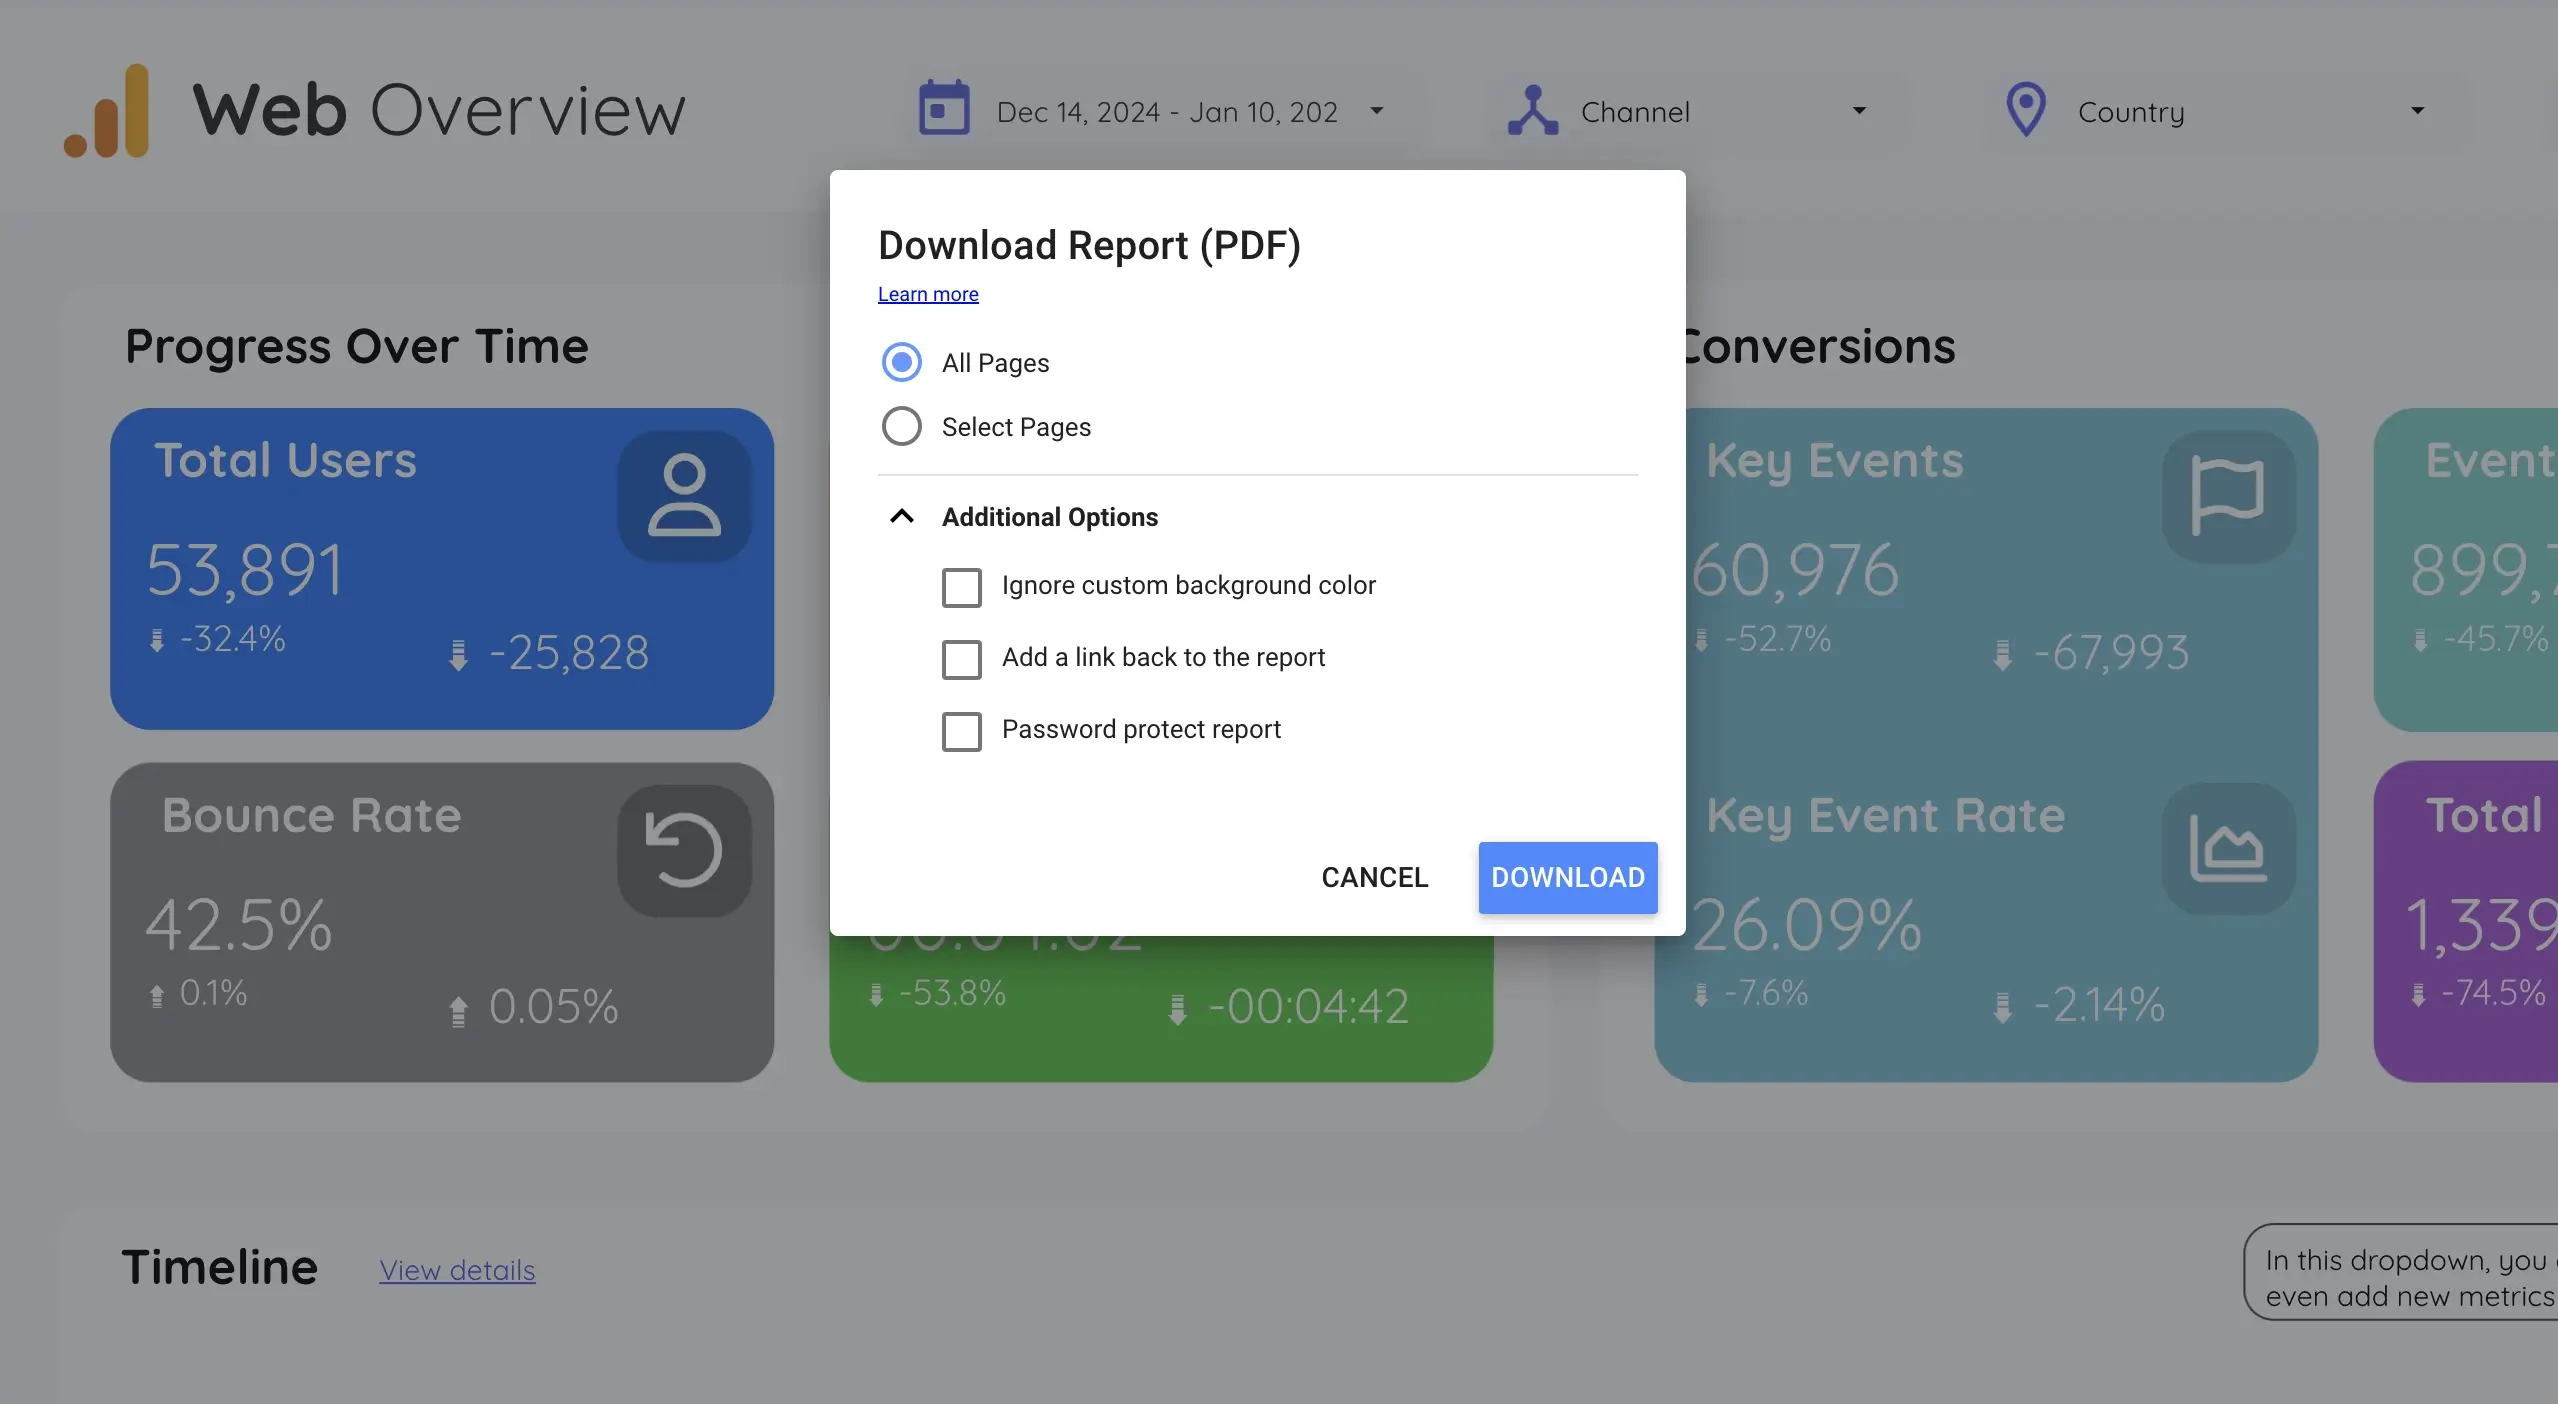
For one-off presentations or delivering polished reports, exporting a PDF is the simplest solution.
How to Export a PDF
- Click Share and select Download Report.
- Customize the export settings:
- Export specific pages.
- Add a clickable link back to the live dashboard.
- Protect the file with a password.
- Click Download to finalize.
Kodalogic Insight: PDFs are ideal for creating monthly summaries or marketing report templates.
4. Automate Sharing with Scheduled Emails
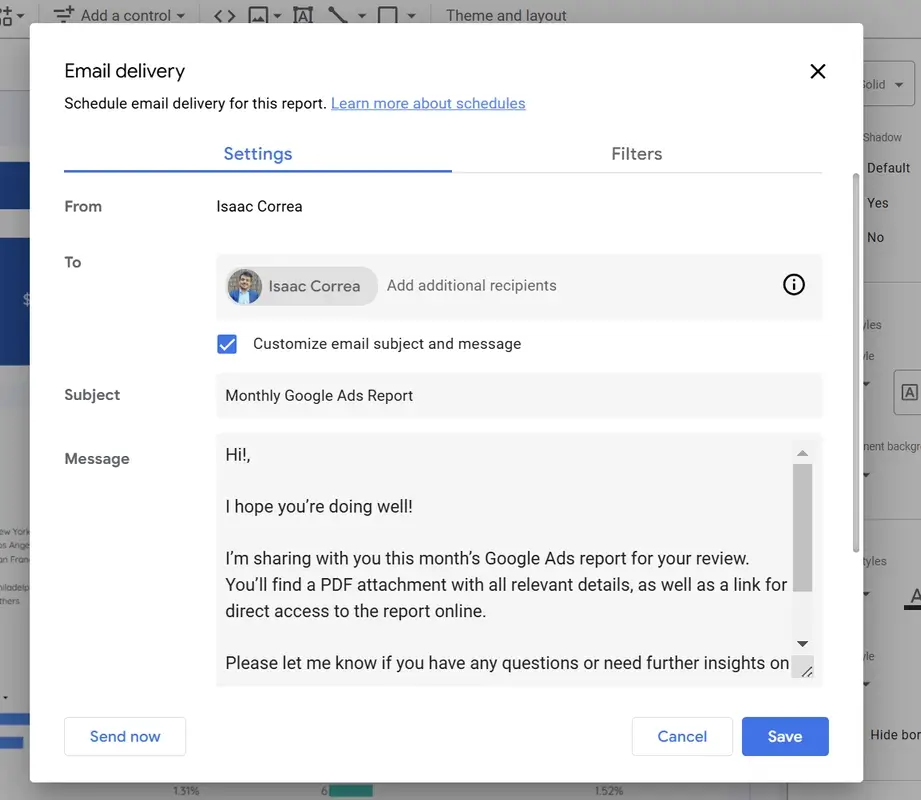
Keep your team and clients updated without lifting a finger. Scheduled email delivery ensures reports arrive exactly when they’re needed.
How It Works
- Click Share and select Schedule Email Delivery.
- Enter recipients and choose delivery frequency:
- Daily, Weekly, or Custom.
- Customize the report pages and date ranges included.
- Click Schedule to confirm.
For an in-depth walkthrough, read our guide on how to schedule dashboards for email delivery.
5. Embed Dashboards on Websites or Apps
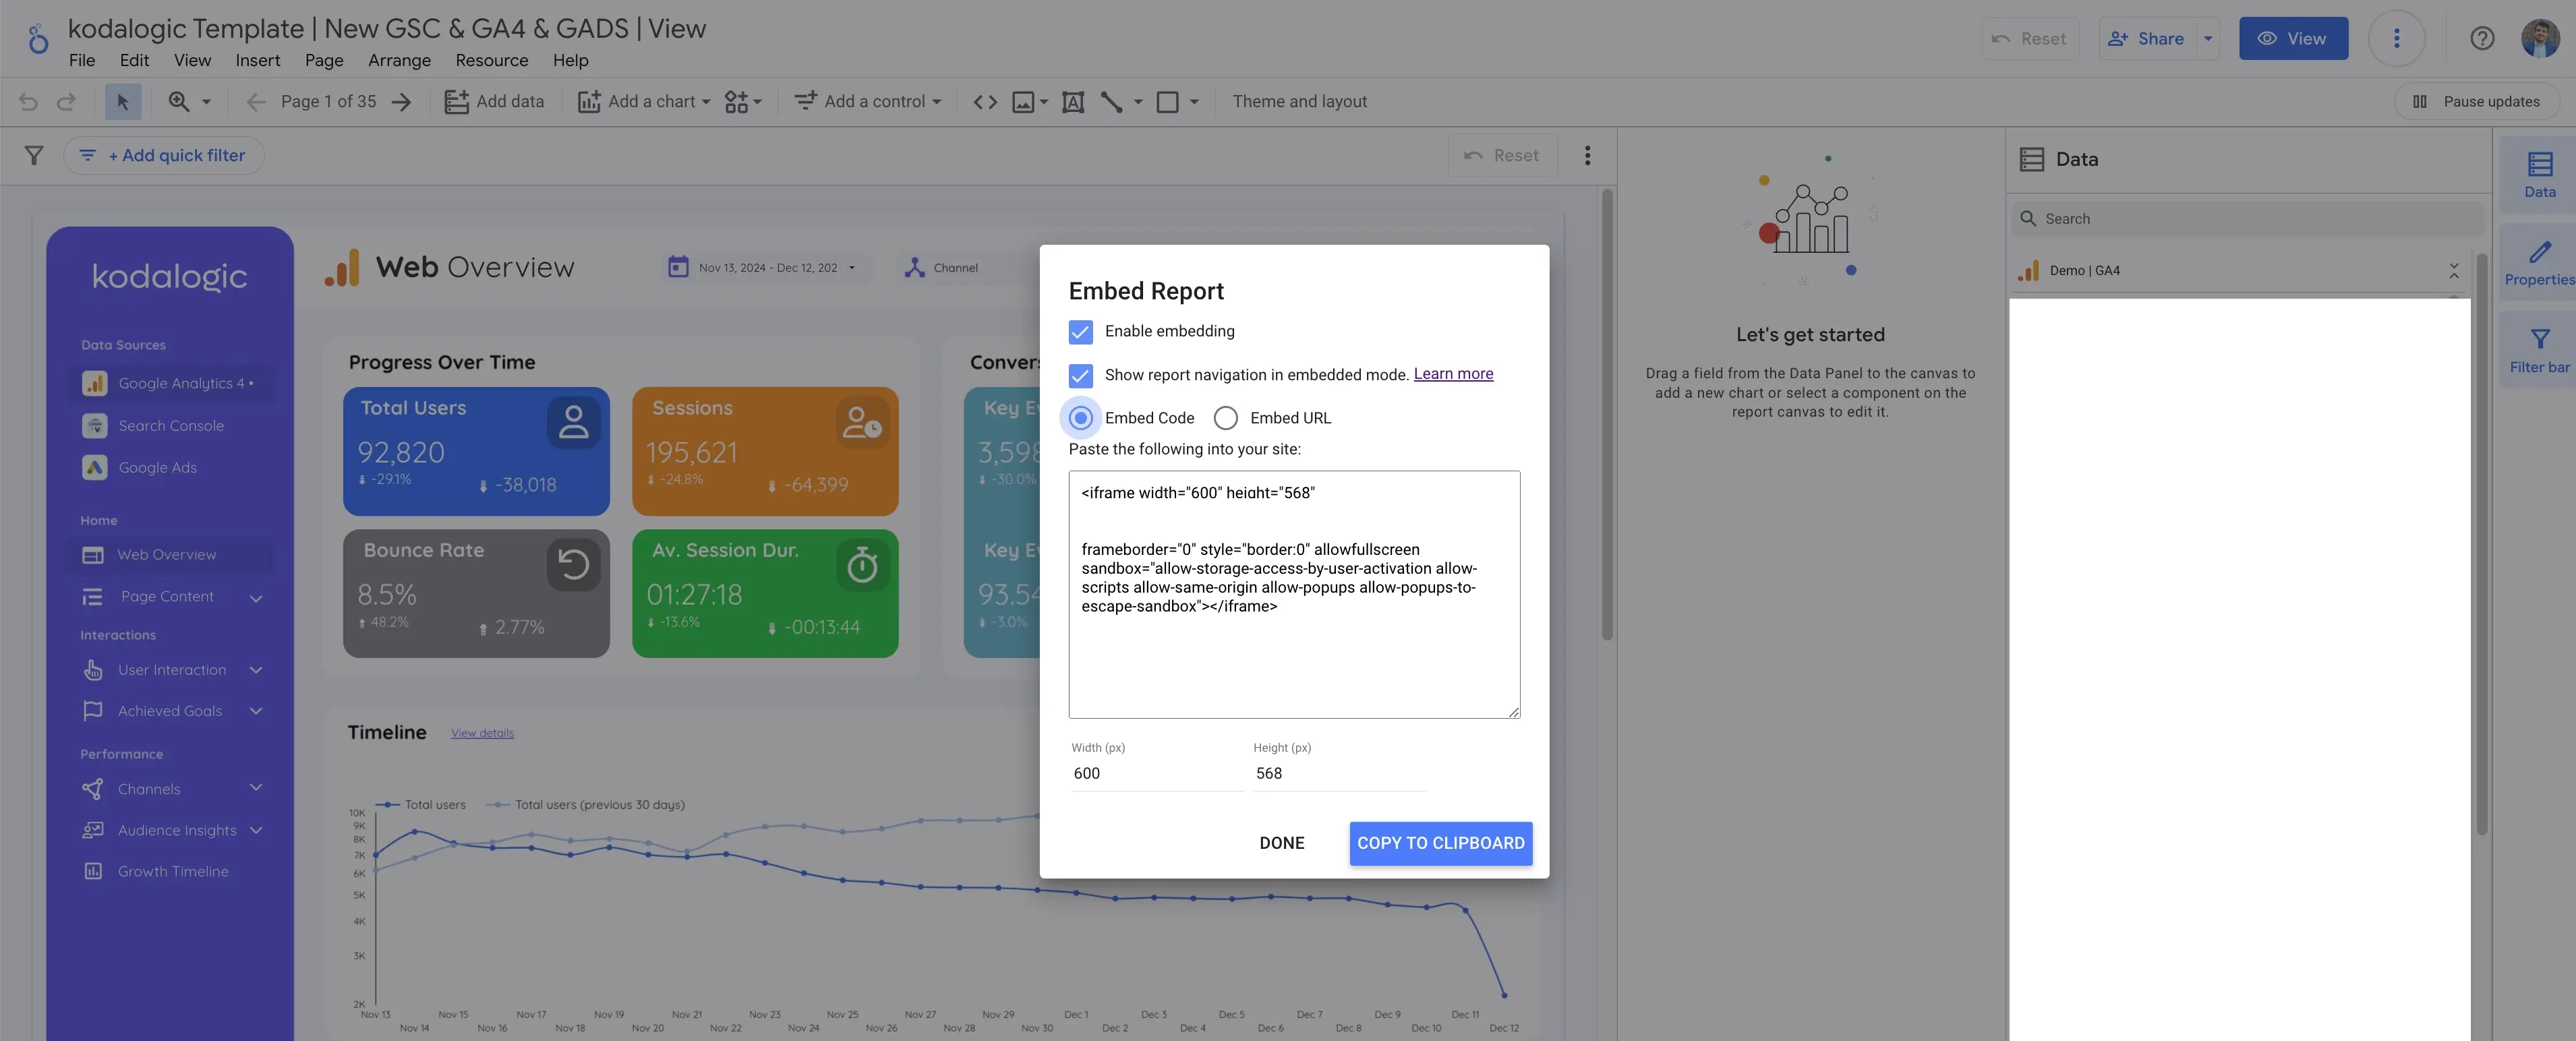
Bring your data closer to your audience by embedding dashboards into websites, internal portals, or client platforms.
How to Embed
- Enable embedding in your dashboard settings.
- Copy the generated HTML iframe code.
- Paste it directly into your platform.
Why Embedding Works
- Fully interactive dashboards.
- Accessible directly within your existing tools.
- Always up-to-date insights in real-time.
Learn more in our post on how to embed reports in Looker Studio.
6. Share on Social Media

Transform your Looker Studio reports into shareable insights on platforms like LinkedIn or Twitter.
Advanced Tips for Sharing Like a Pro
Merge Multiple Data Sources in One Dashboard
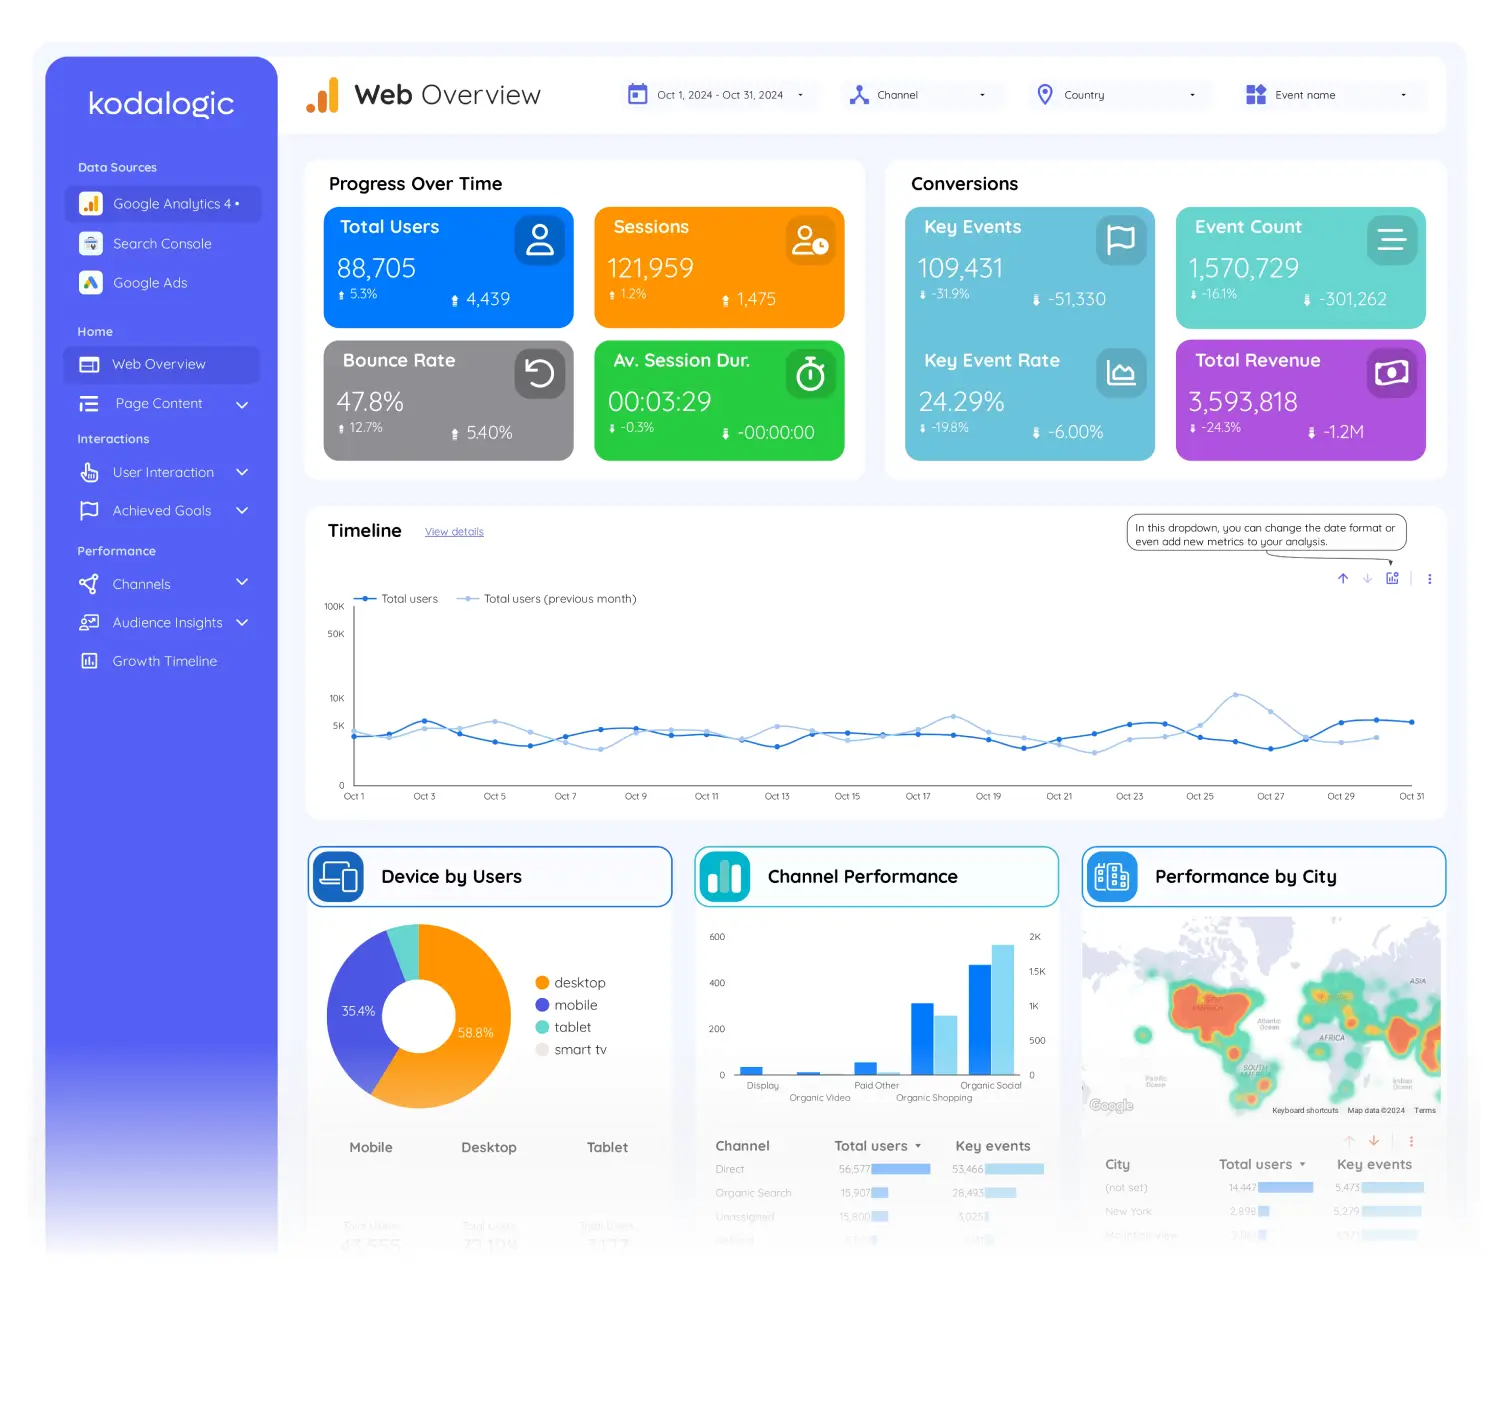
Stop juggling separate reports. Looker Studio lets you combine Google Ads, social media analytics, and website performance into one unified view.
Kodalogic Templates Make It Easy
Start with one of our sleek, pre-built templates designed to handle multi-source data seamlessly.
Export Specific Chart Data for Deep Dives
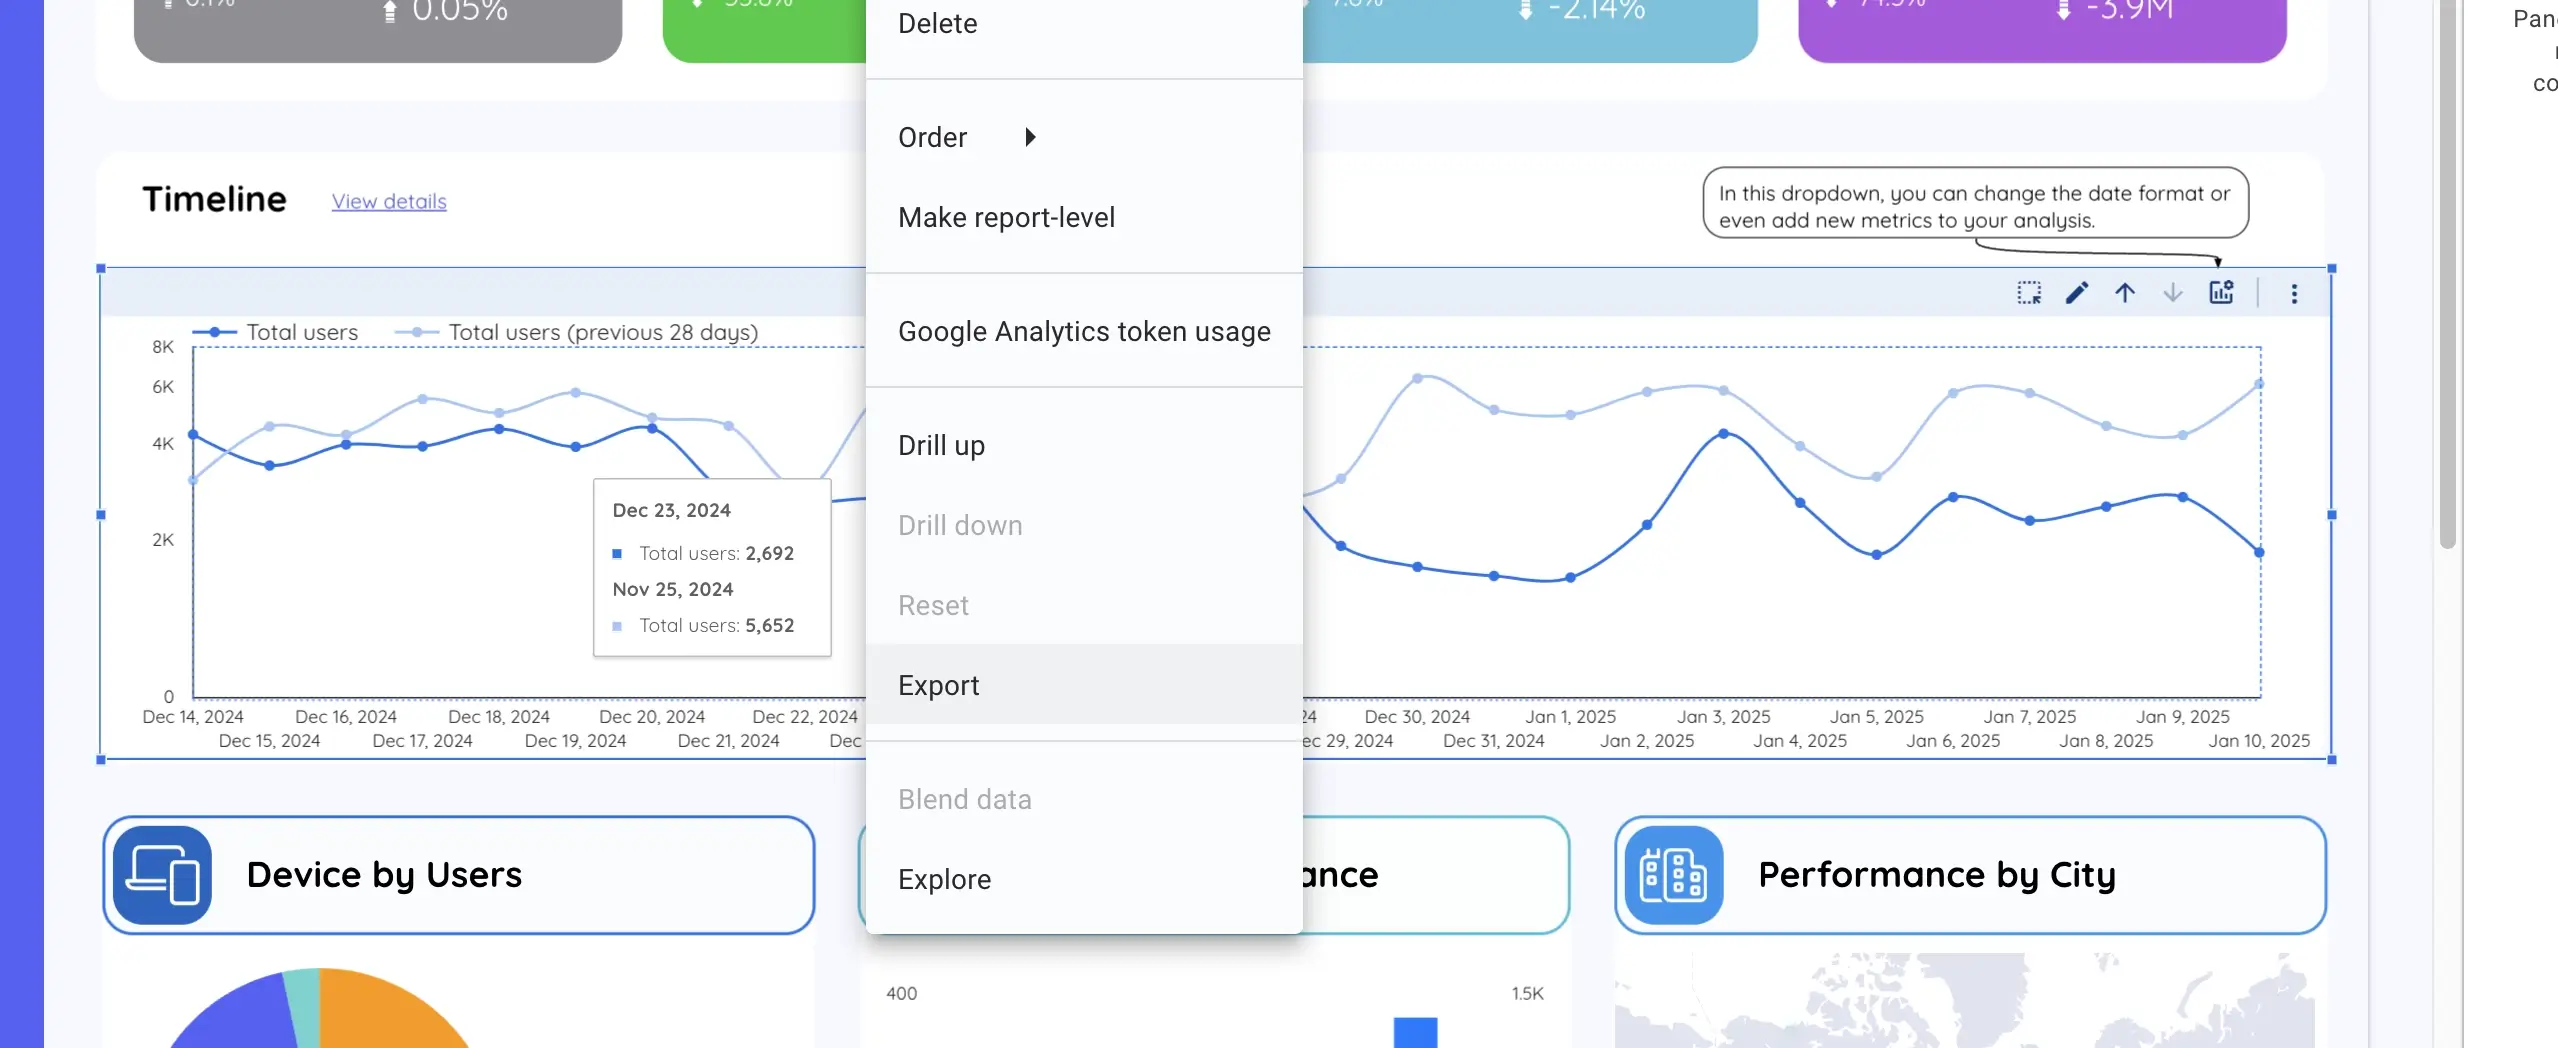
Need to analyze one chart in detail? Export its data with just a few clicks.
- Hover over the chart and click the three-dot menu.
- Select Export Data and choose CSV, Excel, or Google Sheets format.
Pro Tip: Combine this with our Looker Studio templates to streamline your workflow.